Cisco Umbrella is a Cloud driven Secure Internet Gateway that provides protection from Internet based threats, for users wherever they go. As a cloud-delivered service, Umbrella provides the visibility needed to protect internet access across all network devices, office locations, and roaming users.
Cisco Umbrella uses DNS to forward requests from your networks and users to the Umbrella DNS resolvers, preventing threats over any port or protocol, not just HTTP & HTTPS traffic. With the help of the roaming client even threats over direct IP connections can be stopped.
Using DNS we can make many threat discoveries, first off, all devices will send DNS requests to Cisco Umbrella, these request patterns will then be analyzed to detect threats and anomalies, before a decision is made whether to permit or deny the traffic.
The configuration is very easy.
Basic configuration
- Change your dns server on your device and point the umbrella servers (actually 208.67.222.222 and 208.67.220.220). My suggestion is to change dns server to the dhcp server settings.
- Log into your umbrella account.
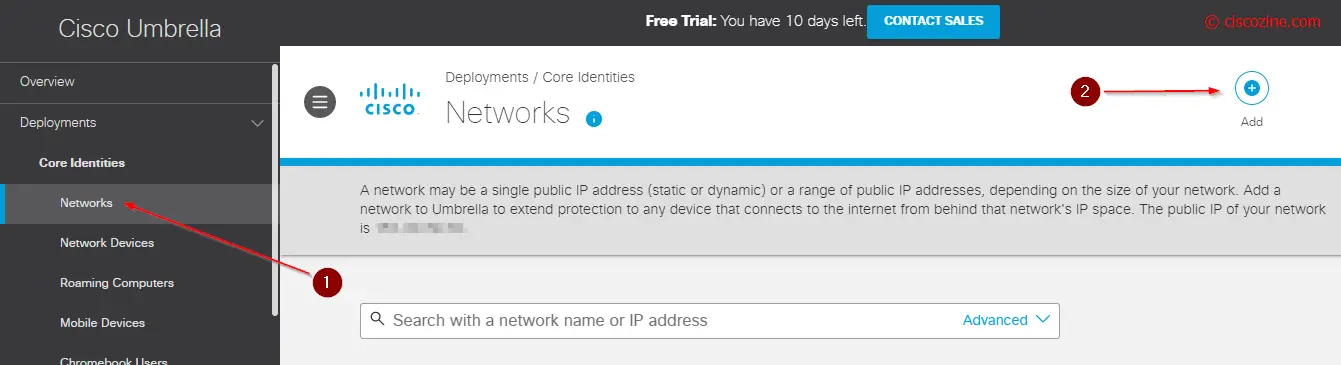
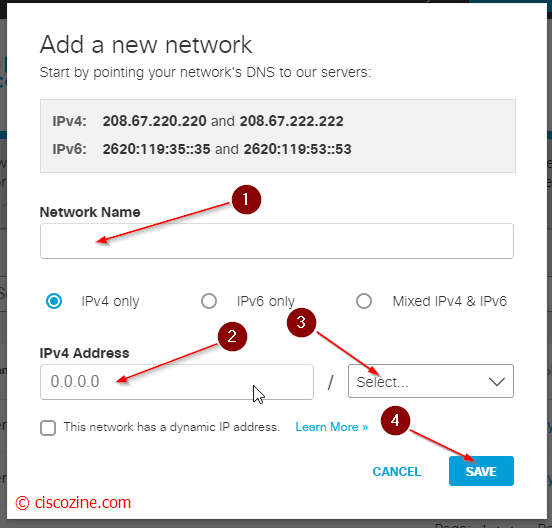
- Add your public network; if your company has multiple public connections add each one.
The basic configuration is completed! Now you can see and manage the dns requests in your Umbrella dashboard. By default, only malware, cnc, phishing and cryptomining are blocked, but obviously this can be customized.

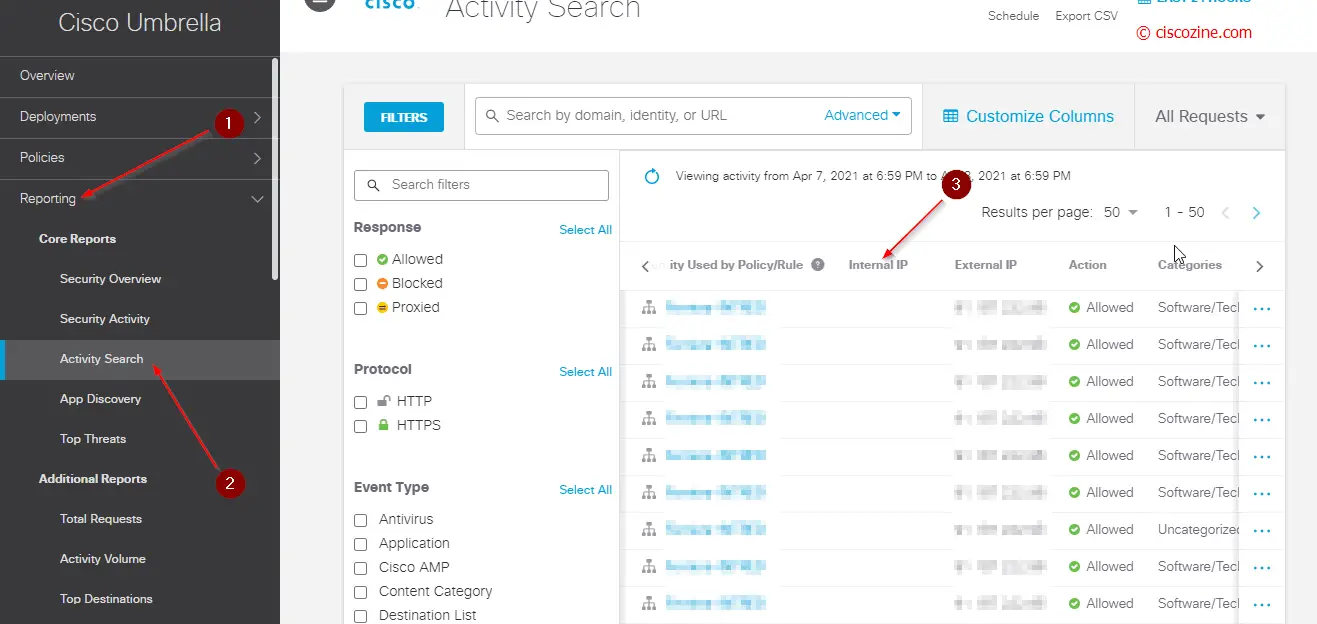
Note: the activity search report contains only the public IP (External IP). To receive also the internal IP information, you need to install the Umbrella VM.
Umbrella VA
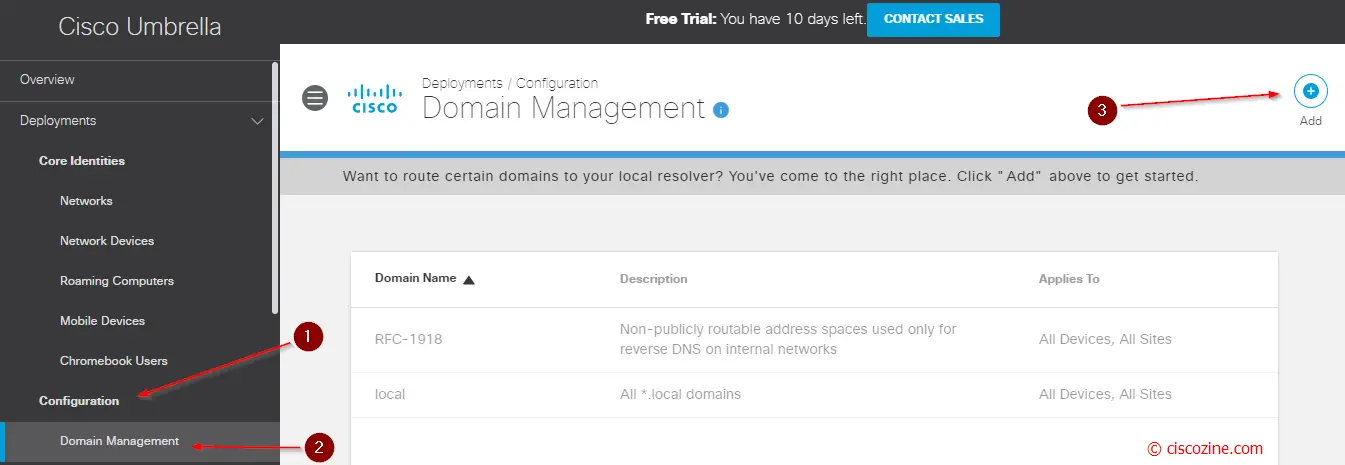
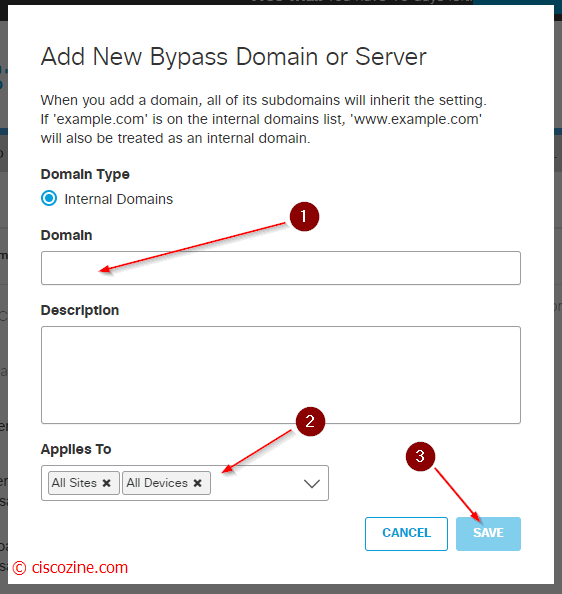
- Add your internal domains; for instance, if your company has the local domain “ciscozine.local”, the umbrella VM Server have to forward the DNS query “*.ciscozine.local” to your local DNS server. This will be more clear at the end of the article.
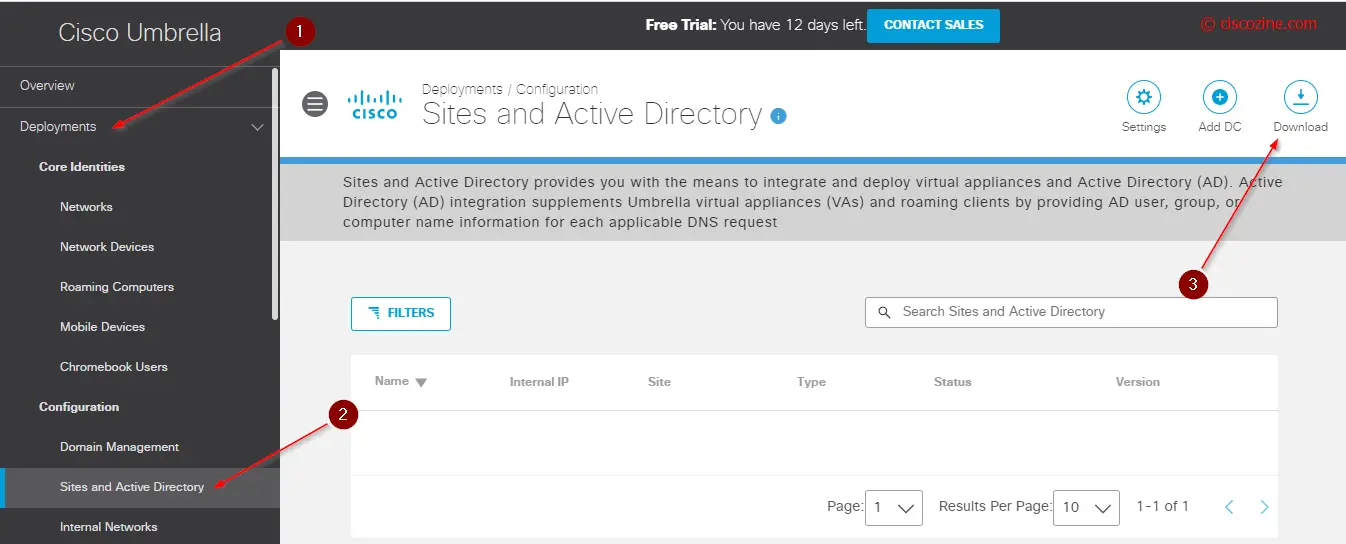
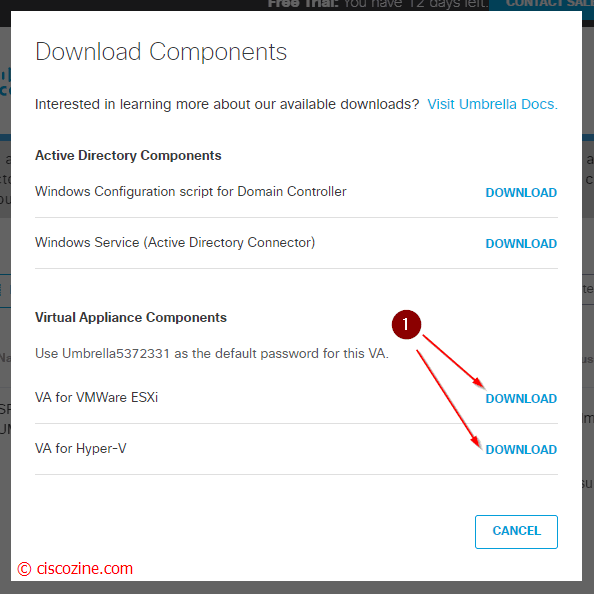
- Download the virtual machine (can be vmware or hyper-v):
- Deploy the virtual machine that you have downloaded.
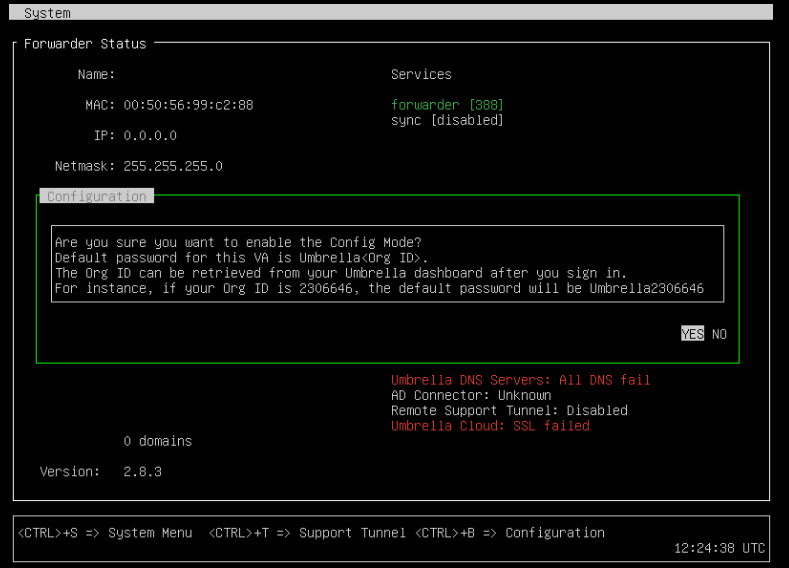
- Power on the VM and access it via console. You will see somethings like that.
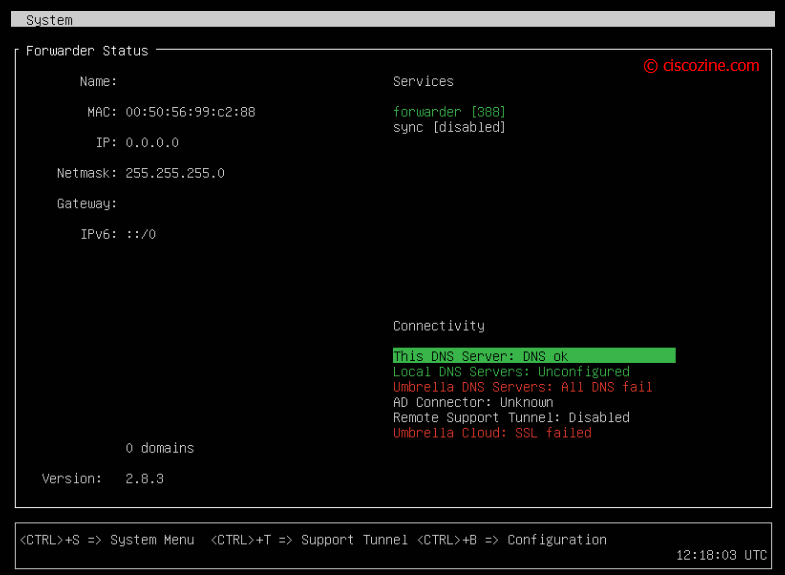
- Press CTRL+B to enter the configuration.
Note: The default password is “Umbrella” plus the organization ID. The ID can be found in the link of your browser. For instance, after log in my umbrella account, I will see this link: “https://dashboard.umbrella.com/o/5912330/#/overview”. So, the password will be “Umbrella5912330“.
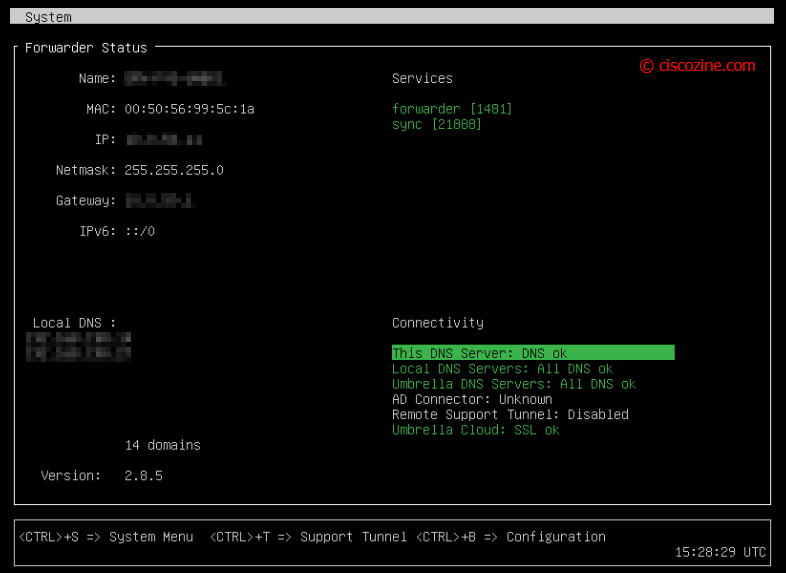
- Find the VNIC name using the command “config va show”; in my case the VNIC name is ens160.
- Configure the VNIC: “config va interface <name-interface> <ip> <mask> <gw>”.
In my case: “config va interface ens160 10.0.100.11 255.255.255.0 10.0.100.254”. - Configure the VM name: “config va name <name>”.
In my case: “config va name UMB-VM-01”. - Enable SSH Service: “config va ssh enable”.
- Define your local DNS server (do you remember the bypass domain in the cloud?): “config va localdns <dns1> <dns2> …”.
In my case: “config va localdns 10.0.100.111 10.0.100.112”. - Define your NTP server: “config ntp add <ip_ntp_Server>”.
In my case: “config ntp add 10.0.20.250”. - The configuration is completed!
If you want to check the status and to show the configuration use the commands: “config va status” and “config va show”. - You can exit from the configuration menu with “exit” command.
Now, it is possible access to the VM via SSH with the username “vmadmin”.
Note: It is strongly recommended make a second Umbrella VM server due to the critical role of DNS protocol.
Remember: Ensure that traffic on port 53 TCP/UDP to and from the VAs is excluded from packet inspection, as Umbrella’s DNS encryption methods might be flagged and dropped. If the VAs cannot successfully send and receive encrypted DNS packets, Umbrella displays a warning in the dashboard.