In the article “How to configure PassiveID in Cisco ISE“, I explained how PassiveID gathers information from the Microsoft Active Directory environment allowing user-to-IP mapping information with or without having 802.1X deployed.
But how this data is sent to Cisco Firepower? Using pxGrid, a protocol that is now IETF-approved standard described in RFC 8600 and published in June 2019.
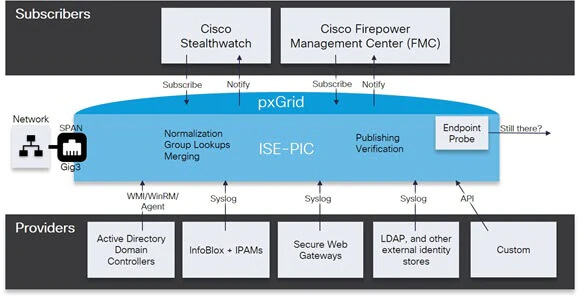
Cisco pxGrid (Platform Exchange Grid) enables cross-platform information exchange in relation to particular data context. It provides a unified framework that enables partners to integrate to pxGrid once, then share context either unidirectionally or bidirectionally with many platforms without the need to adopt platform-specific APIs.
pxGrid key features:
- Ability to control what context is shared and with which platforms.
- Bidirectional context sharing.
- Ability to share context data in native formats.
- Ability to connect to multiple platforms simultaneously.
- Integration with Cisco platforms.
pxGrid architecture is based on Publish-Subscribe approach where consumers of data subscribe to given topic and provider publishes information to that topic, which in turn the broker distributes to all subscribed consume.
Note: Cisco ISE-PIC accepts only Cisco subscribers, while Cisco ISE accepts multivendor subscribers.
Remember: pxGrid communication is based on PKI.
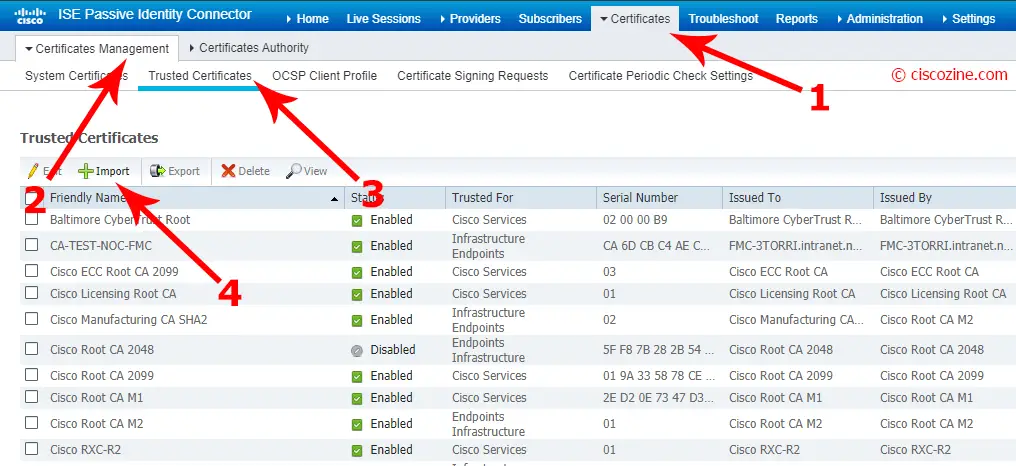
ISE-PIC Certificate configuration
Import the CA:
Choose the CA file and click on “Submit”:
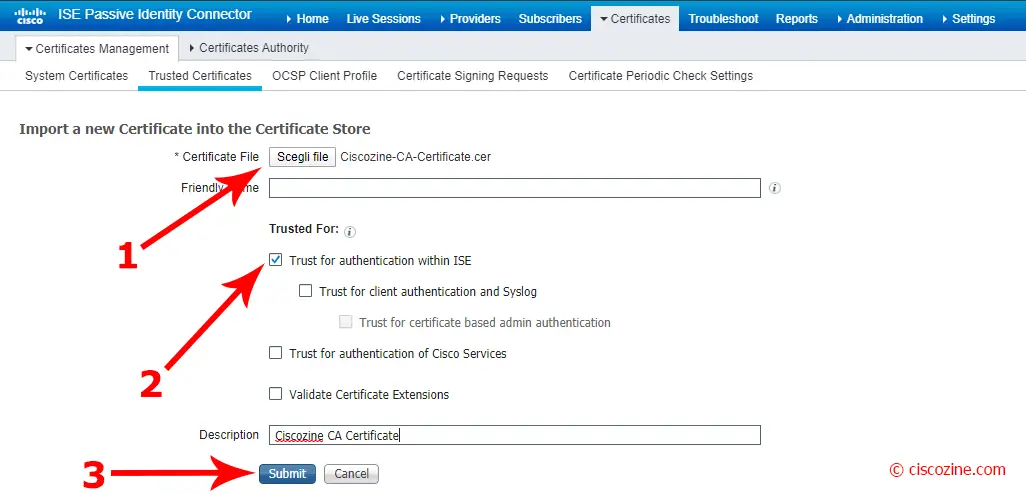
Note: Flag the check box “Trust for authentication with ISE” if you want to verify server certificates (from other ISE nodes or LDAP servers).
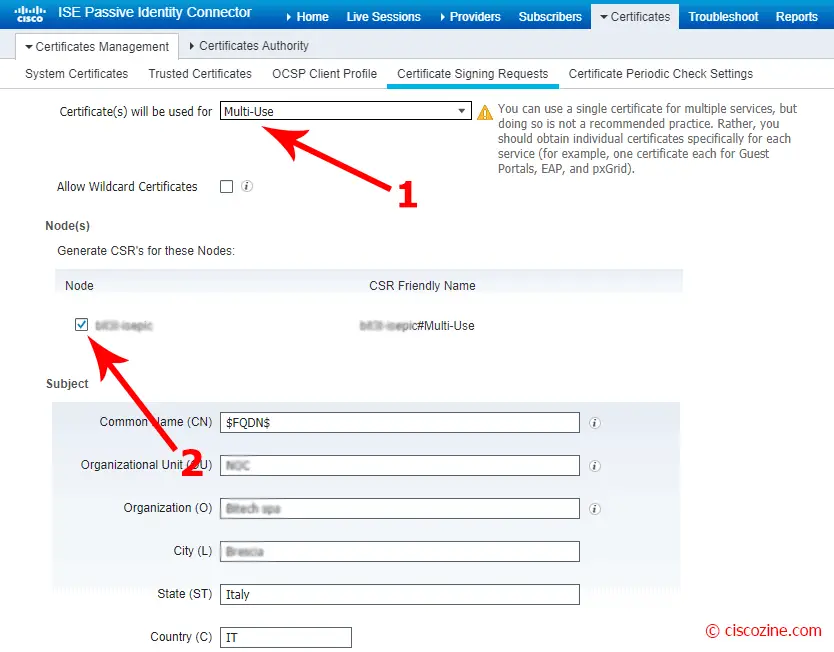
Generate certificate signing request (CSR):
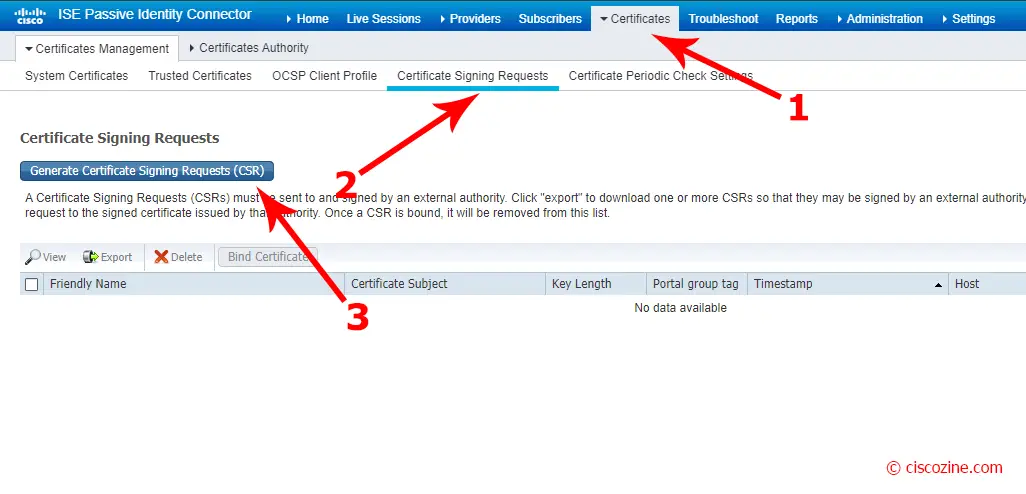
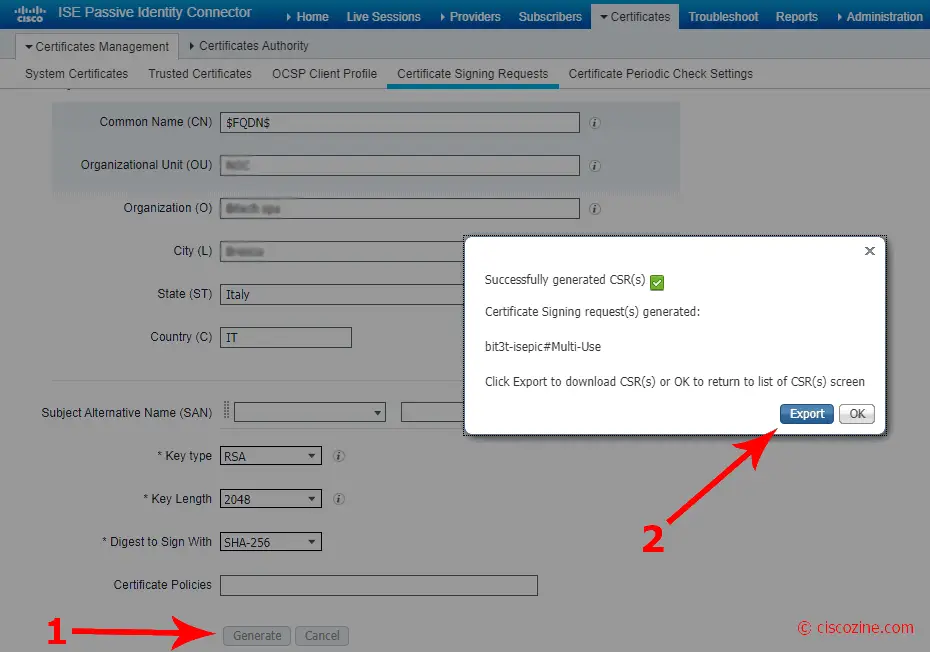
Select Multiuse certificate, the node and compile all certificate fields; then, click on “generate”:
Export the CSR and give the .pem file to the CA administrator:
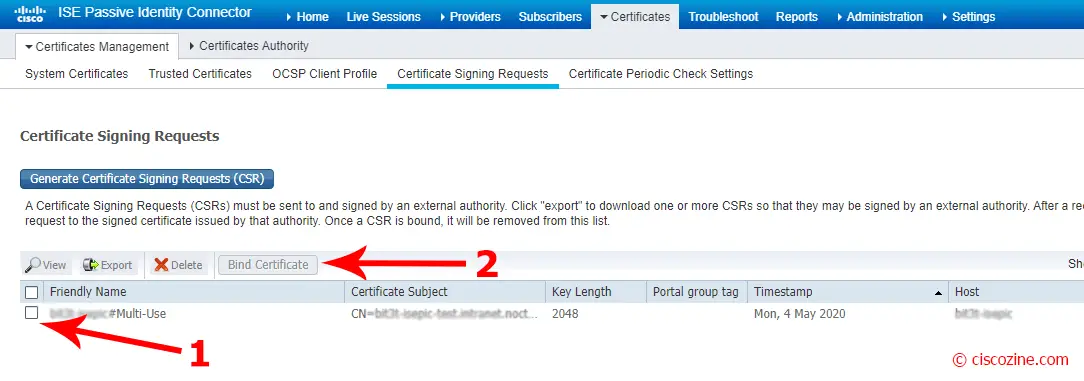
Select the CSR just created and click on “Bind certificate”:
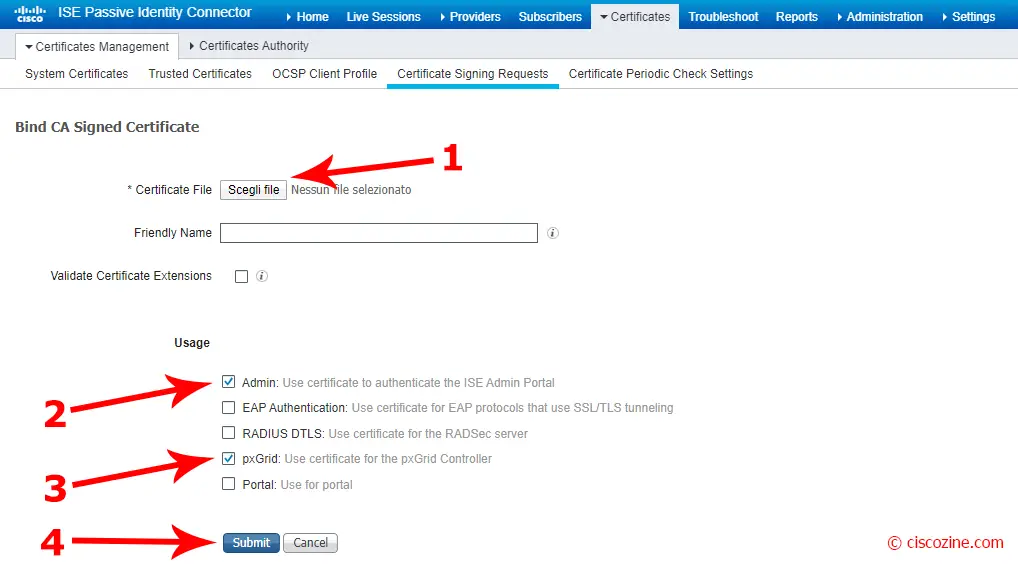
Import the certificate file signed by the CA, select “Admin” and “pxGrid” as usage and click on “Submit”.
The new certificate signed by the CA appears in the “System Certificates” section.
Note: Enabling Admin role for this certificate will cause an application server restart on the selected node.
Remember: Certificate for pxGrid must contain both client and server authentication in the Extended Key Usage (EKU) extension.
Cisco FMC Certificate configuration
As for ISE-PIC, Cisco FMC requires CA and server certificates.
Import the CA:

Choose a name, import the CA and click on “Save”.

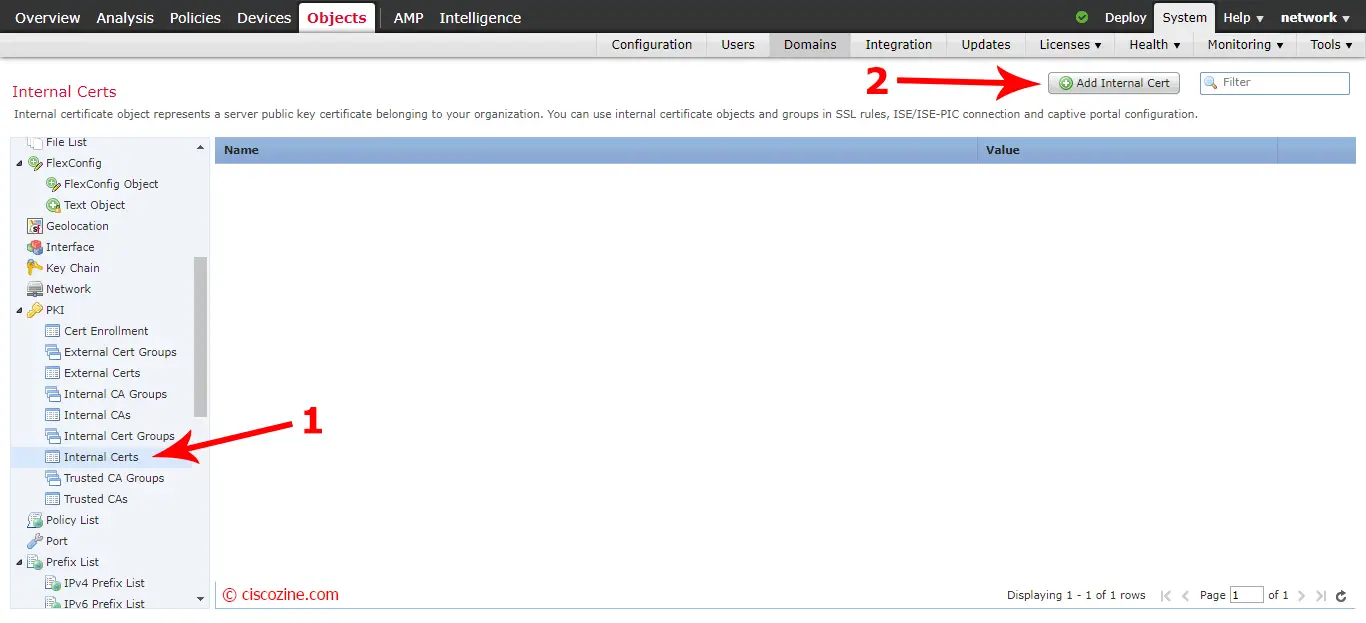
Import internal certificate:
At the moment, Cisco FMC does not offer a menu to generate a Certificate Signing Request (CSR); to accomplish this step, use the openssl tool suite; in my case, I use the openssl command via Cisco FMC expert mode.
First of all, access to the Cisco FMC via command line and type “expert“:
Copyright 2004-2020, Cisco and/or its affiliates. All rights reserved.
Cisco is a registered trademark of Cisco Systems, Inc.
All other trademarks are property of their respective owners.

Cisco Fire Linux OS v6.6.0 (build 37)
Cisco Firepower Management Center for VMWare v6.6.0 (build 90)


>
>
> expert
Create the private key:
admin@FMC-Ciscozine:~$ openssl genrsa -out FMC-private.key 2048
Generating RSA private key, 2048 bit long modulus
...........................
........................
e is 65537 (0x10001)
admin@FMC-Ciscozine:~$
Create the CSR and compile the fields request:
admin@FMC-Ciscozine:~$ openssl req -new -key FMC-private.key -out FMC-Certificate.csr
You are about to be asked to enter information that will be incorporated
into your certificate request.
What you are about to enter is what is called a Distinguished Name or a DN.
There are quite a few fields but you can leave some blank
For some fields there will be a default value,
If you enter '.', the field will be left blank.
-----
Country Code []:IT
State or Province Name []:Italy
Locality Name []:Test
Organization Name []:Ciscozine
Organizational Unit Name []:Networking-BU
Common Name []:FMC-Ciscozine.intranet.noctst.local
Email Address []:
admin@FMC-Ciscozine:~$
Save the two files (CSR and private key) on your pc.
Note: OpenSSL is an open-source command line tool that is commonly used to generate private keys, create CSRs, install your SSL/TLS certificate and identify certificate information.
As done before, give the CSR “FMC-Certificate.csr” to the CA administrator to sign it.
Import the internal certificate:
Choose a name, import the Certificate signed by the CA and the private key, then click on “OK”:
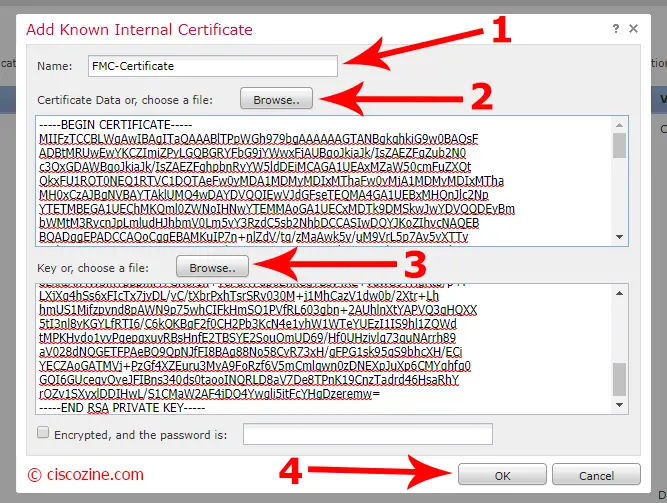
Remember: Certificate for pxGrid must contain both client and server authentication in the Extended Key Usage (EKU) extension.
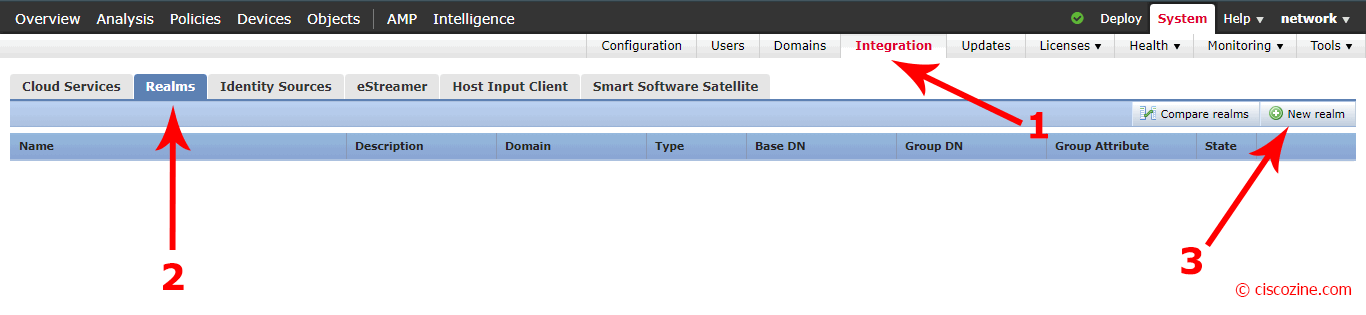
Add a new realm to FMC
The last step is to configure the realms. This is mandatory for defining access policy based on username or group.
Go to “System”, “Integration”, “Realms” and “New realm”:
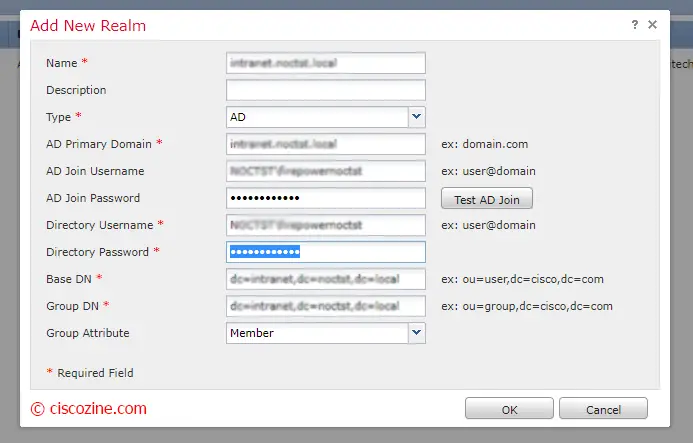
Compile all fields. If the “Test AD Join” is successful, click OK:
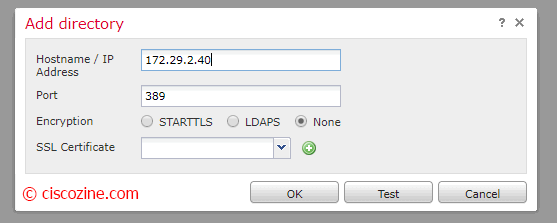
Click on the “Directory” tab and click “Add directory”:

Configure IP/Hostname, the encryption and test Connection; if ok, press “OK”:
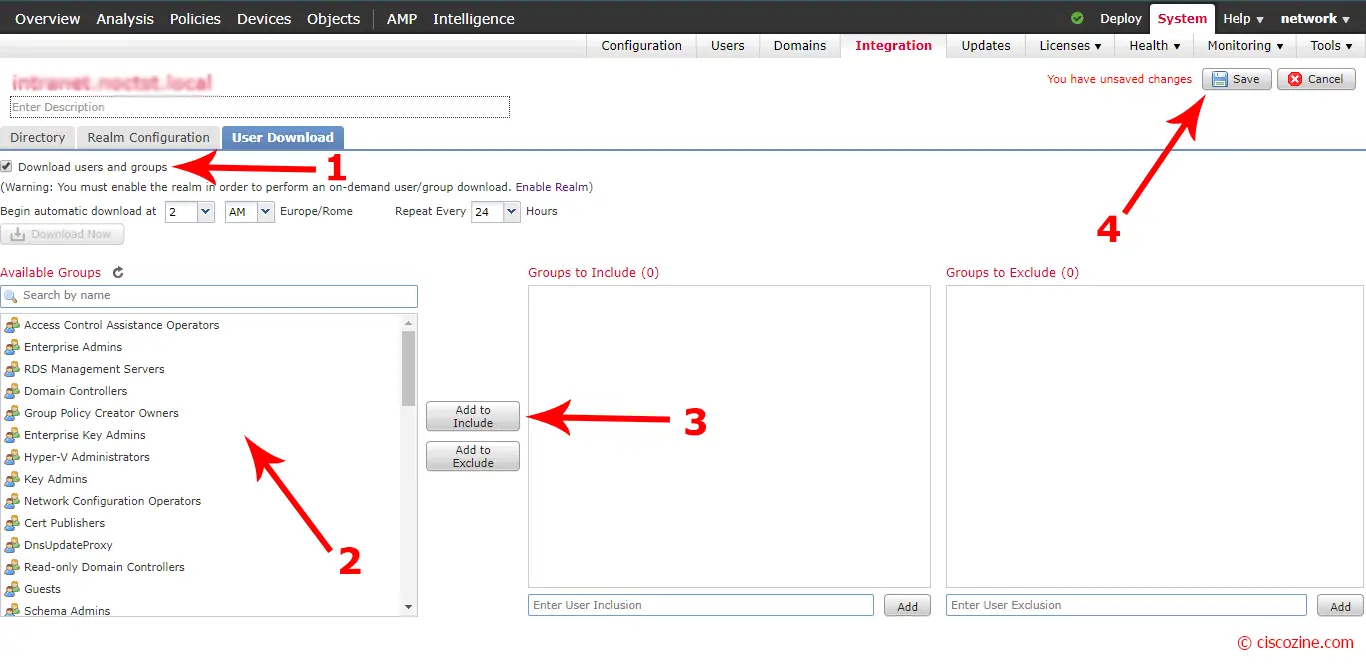
Flag “Download users and groups” to schedule the download of it; then, select the group that you want control via access policy, click on “Add to Include” and save:
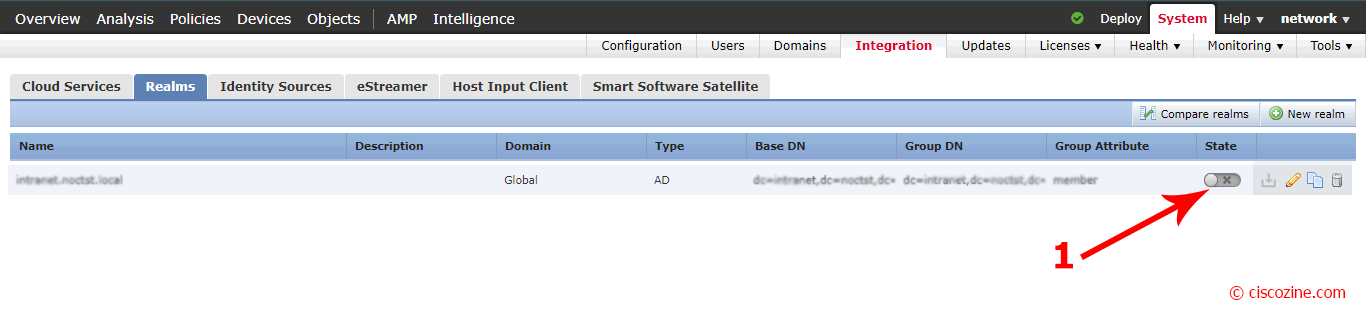
Enable the realm that you have just created and deploy the configuration if required.
Configure identity source
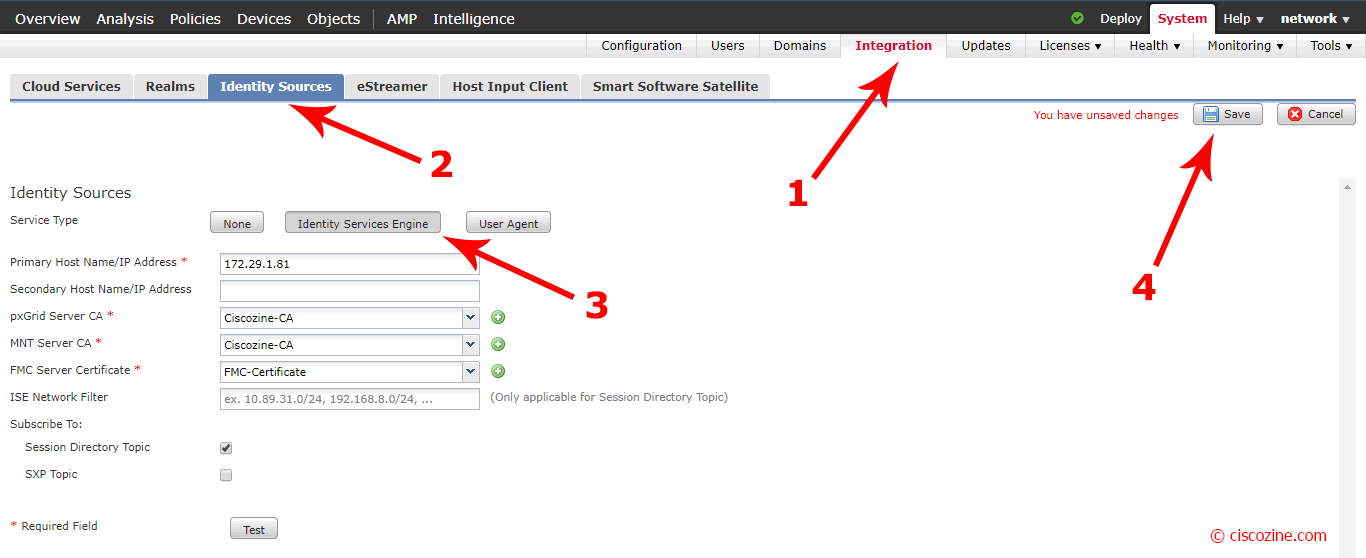
Go to “System”, “Integration”, “Identity Sources” and select “Identity Services Engine”; compile the field “Primary Host Name/IP Address” with the ISE-PIC IP Address and select:
- pxGrid Server CA: Ciscozine-CA (the CA certificate that you have previously imported)
- MNT Server CA: Ciscozine-CA (the CA certificate that you have previously imported)
- FMC Server Certificate: FMC-Certificate (the server certificate that you have previously imported)
Flag “Session Directory Topic” and click on “Test” (in older FMC, this option is not present; don’t worry).
Click on “Save” and deploy the new configuration if required.
Note: due a possible FMC bug, sometime the test result is “ISE connection status: Primary host: Failure”. Don’t worry about it.
Come back to ISE-PIC GUI; go to Subscribers section and approve the new FMC subscribers:
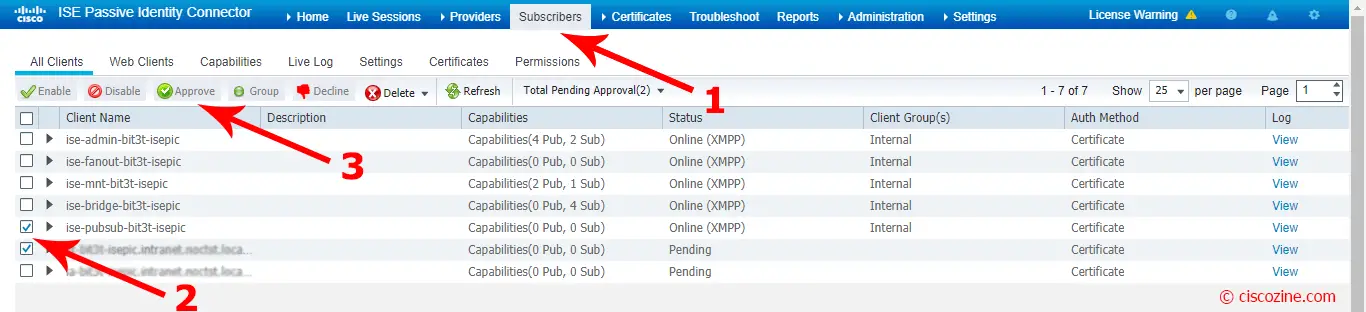
Refresh the page: the new subscribers change status from “Pending” to “online”.
Note: If all is successful, there should be two firepower connections listed in the client list. One for the actual FMC and one for the test device that was used when you clicked the Test button in FMC. One should display 2 subs and appear online while the other one connection should display 0 subs and appear offline.
Cisco FMC Policy Configuration
Now that ISE-PIC and FMC are configured, you can configure the policy access based on username or group.
Go to “Policies”, “Access Control”, “Identity”:

Click on “New Policy”:

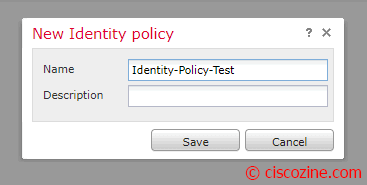
Compile “Name” and “Description” fields and click on “Save”:
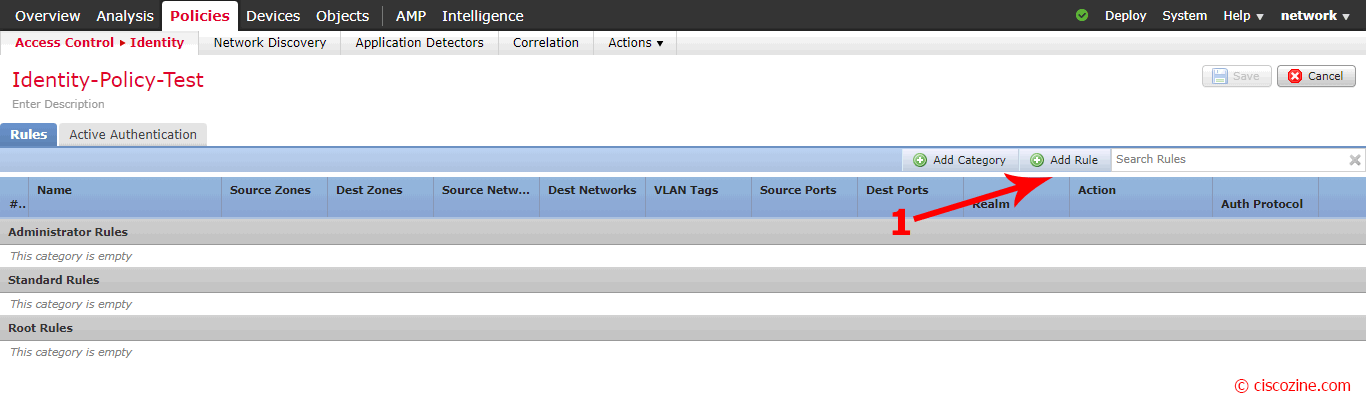
A new menu appears; click on “Add Rule”:
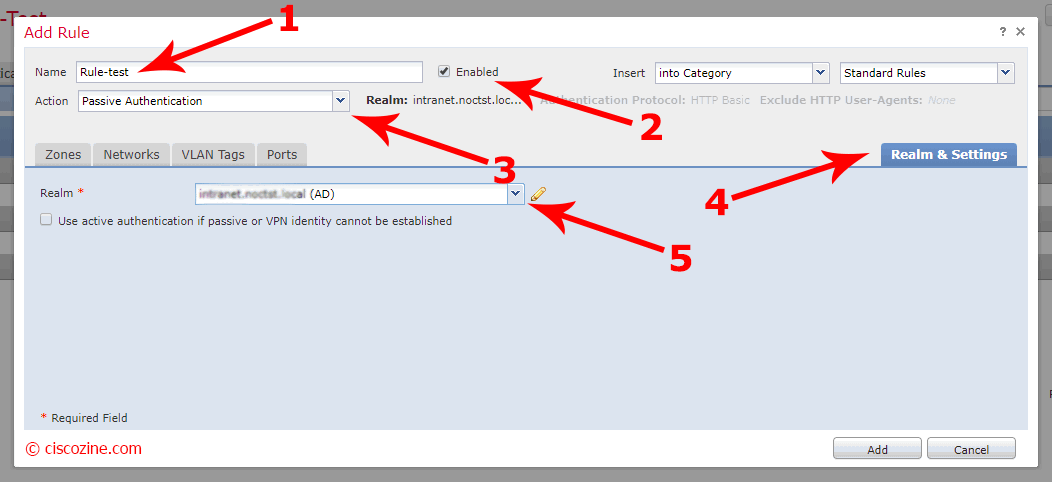
Compile the “Name” field, verify that the rule is enable and the passive authentication is selected. Click on “Realm & Settings” and select the realm that you have previously created. Click “Add”:
Save it and deploy the configuration if required:
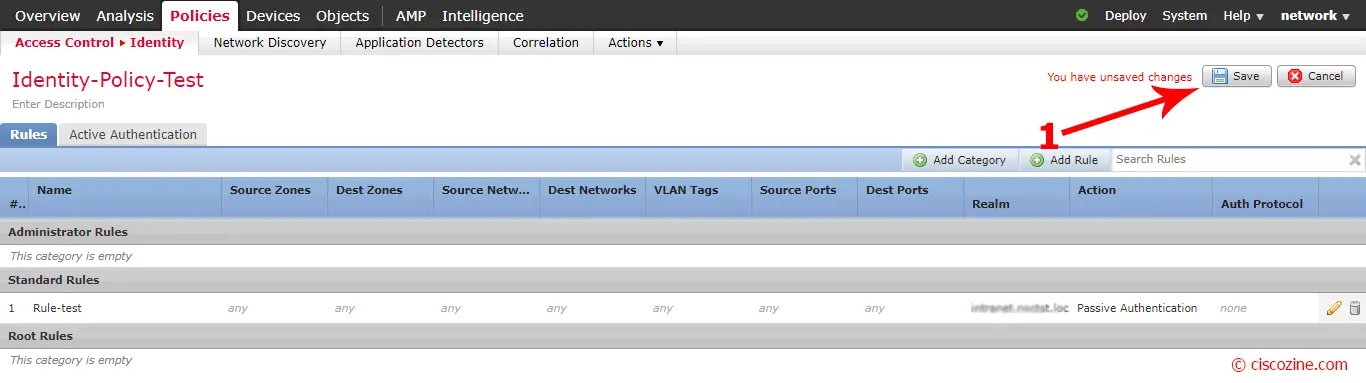
Note: To improve performance, my suggestion is to choose which networks the passive authentication must check.
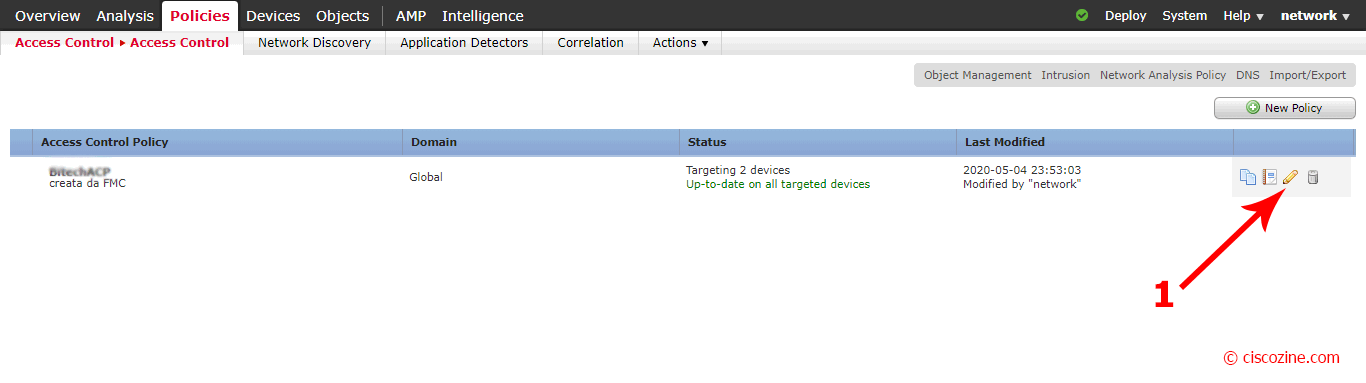
Now, it is possible link the Identity policy to the access policy; click on “Policies”, “Access-Control” and edit your current policy:
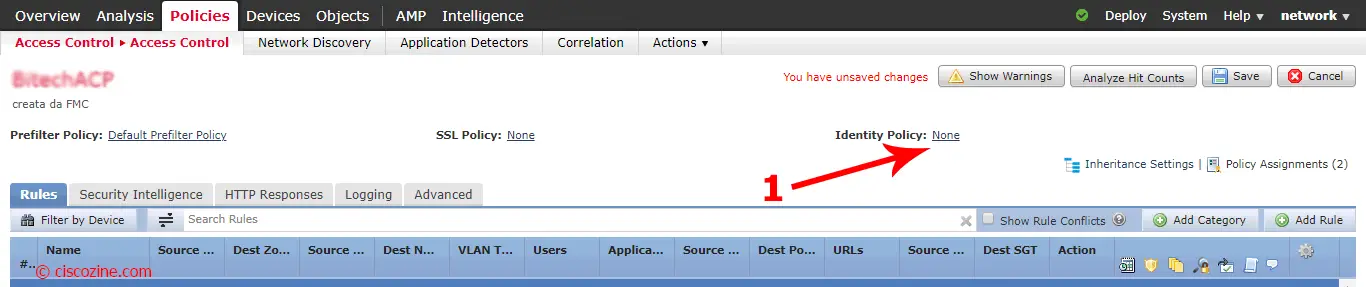
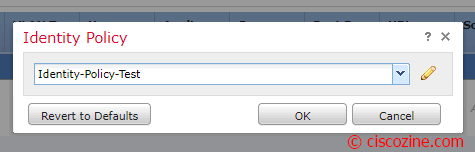
Click on “Identity Policy: none” and select the identity just created:
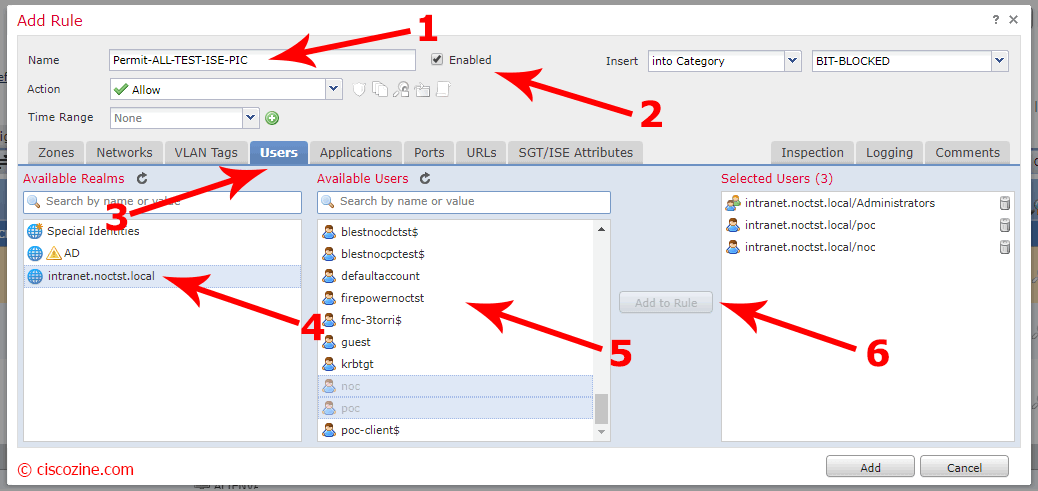
Add or edit a rule; click on “Users” tab, select the realm and select which users or groups the rule must match. Save and deploy the new configuration if needed.
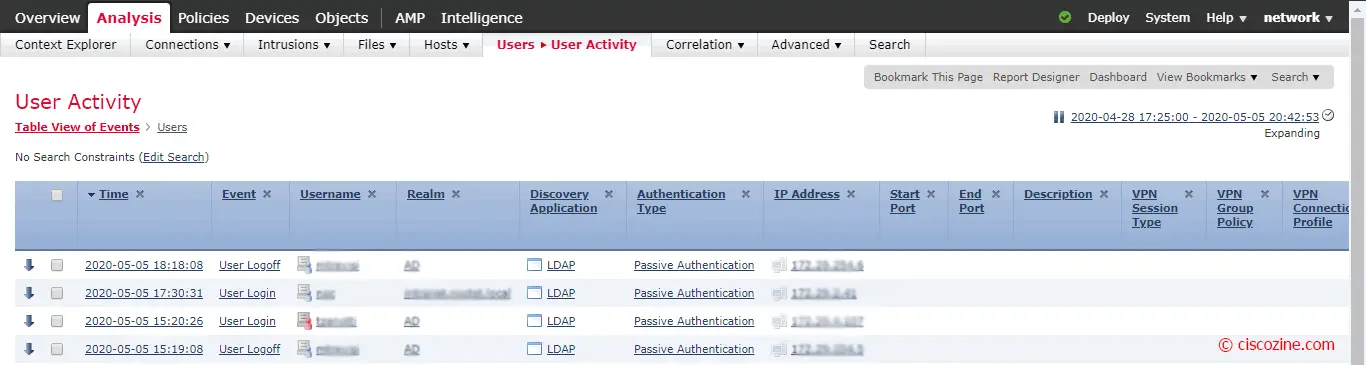
Now, it is possible search log by username or view the user activity as below:
References:
I see the note when adding new realm: This is mandatory for defining access policy based on username or group
But I wonder, if we already have ad connection, can we just collect information from AD instead of pxGrid? Is it the case of identity source > user agent
Thanks