Starting from ISE 2.2, PassiveID is a feature to gather user-to-IP mapping information with or without having 802.1X deployed.
PassiveID gathers information from the Microsoft Active Directory environment using the Microsoft Windows Management Interface or the Active Directory agent, or through a switched port analyzer (SPAN) port on a switch. It can also gather authentication information through syslogs, a Citrix terminal server agent, and a custom API.
The configuration is very easy and requires just a few clicks of a mouse.
First of all, enable the PassiveID service.
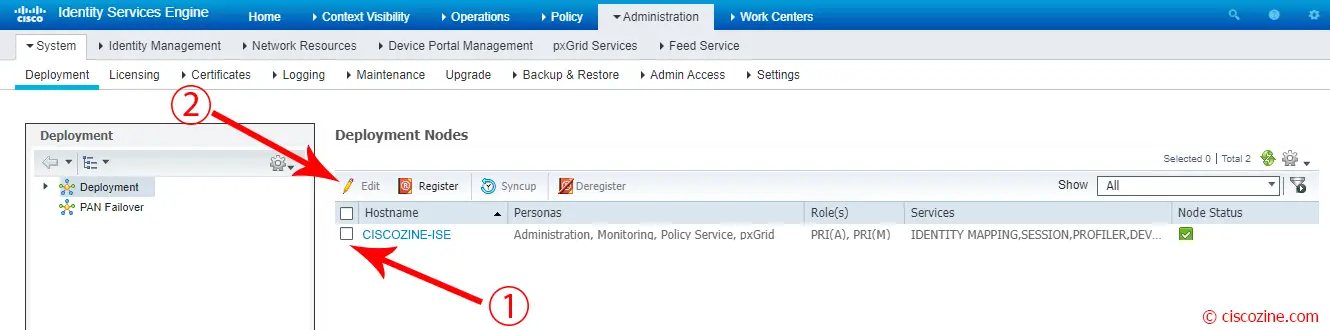
Go to Administration -> System -> Deployment and edit the policy server node.
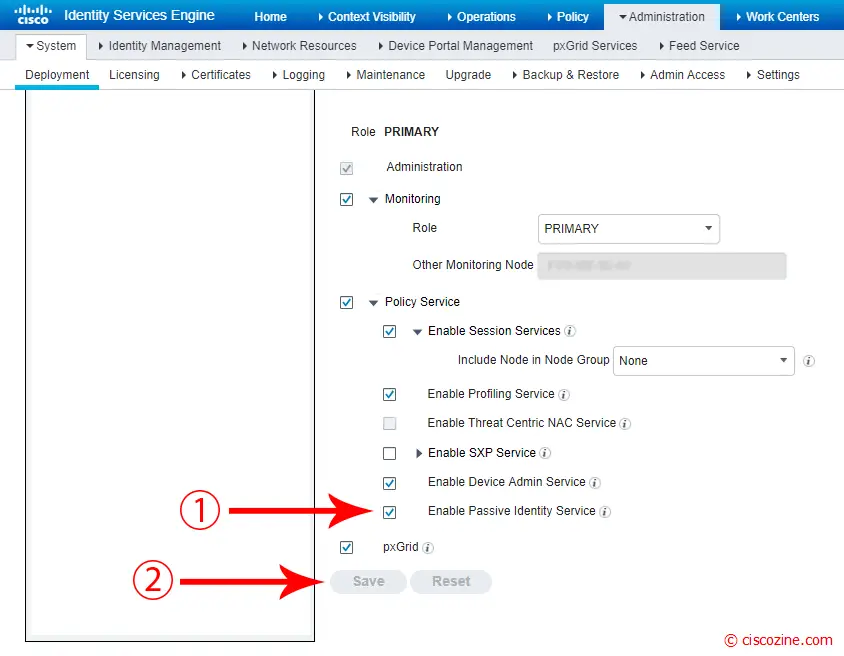
Select “Enable Passive Identity Service” and click “Save”.
You can check the status of PassiveID processes using the command:
Ciscozine-ISE/admin# sh application status ise | i PassiveID
PassiveID WMI Service                  running          23523
PassiveID Syslog Service               running          23842
PassiveID API Service                  running          24461
PassiveID Agent Service                running          24871
PassiveID Endpoint Service             running          25420
PassiveID SPAN Service                 running          25791
Ciscozine-ISE/admin#
Now it is possible add the provider source.
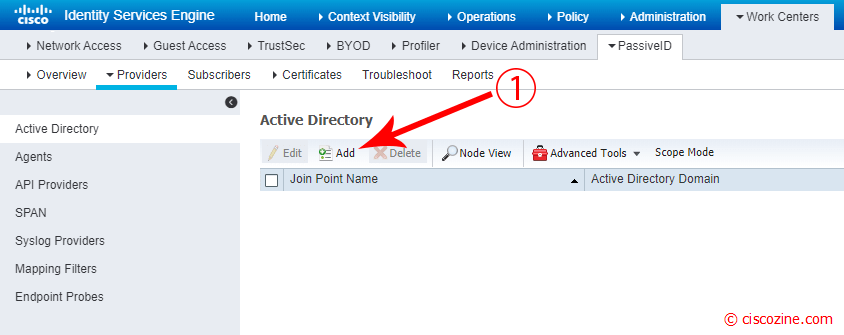
Go to Work Centers -> PassiveID -> Providers and Click on “Add” button.
Note: There are other providers like agents, SPAN, syslog and so on; in this article only the Active directory connection will be used.
Remember: Before adding the Active directory, you have to:
- Ensure you have properly configured the DNS server, including configuring reverse lookup for the client machine from ISE.
- Synchronize clock settings for the NTP servers.
Compile the “Join Point name” and the “Active Directory Domain”, then click on “Submit” button.

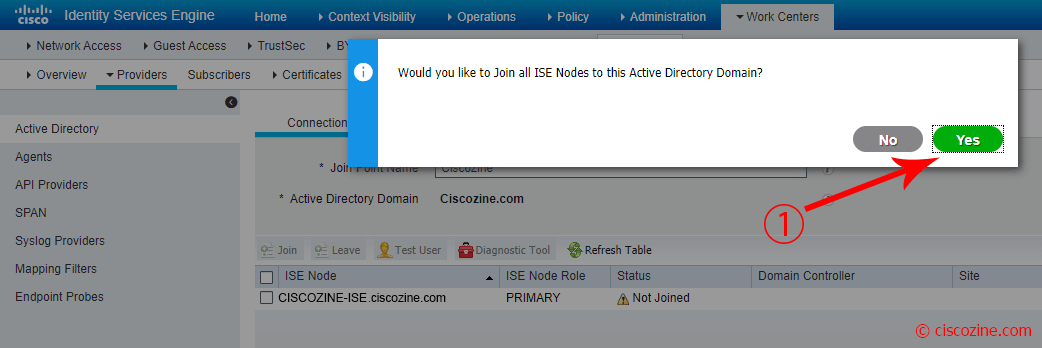
A popup appears; click “Yes”.
Insert the AD Credentials and press “OK”.
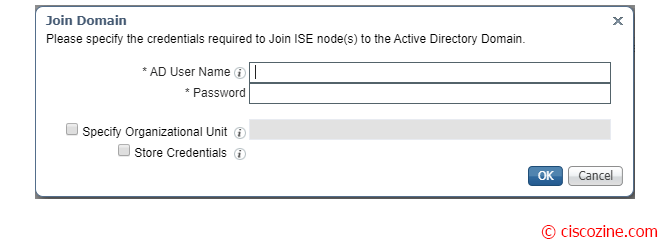
Note: Ensure you have Active Directory Domain Admin credentials, required in order to make changes to any of the AD domain configurations.
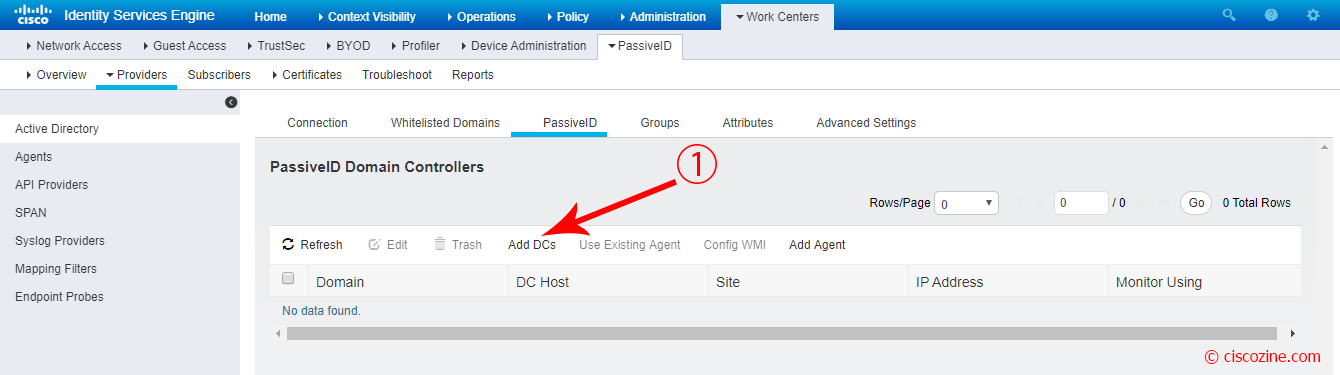
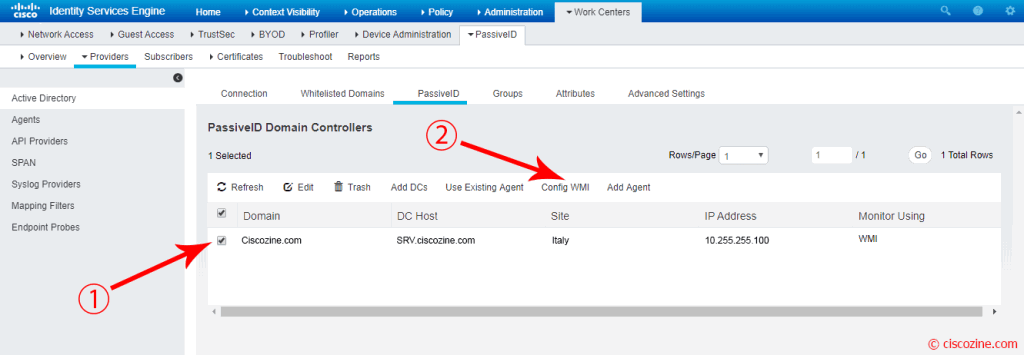
Select PassiveID menu on the right and click on “Add DCs”.
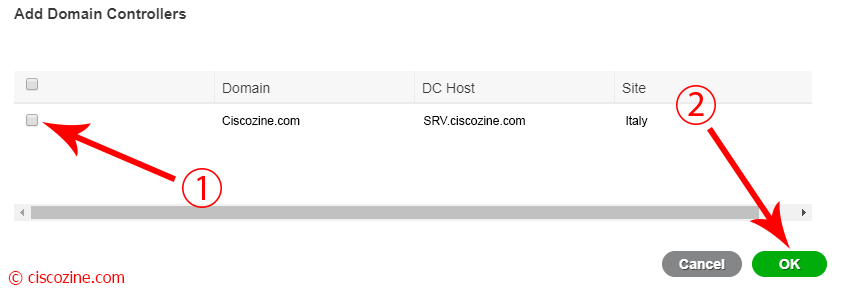
A popup appears; select your DC host and click “OK”.
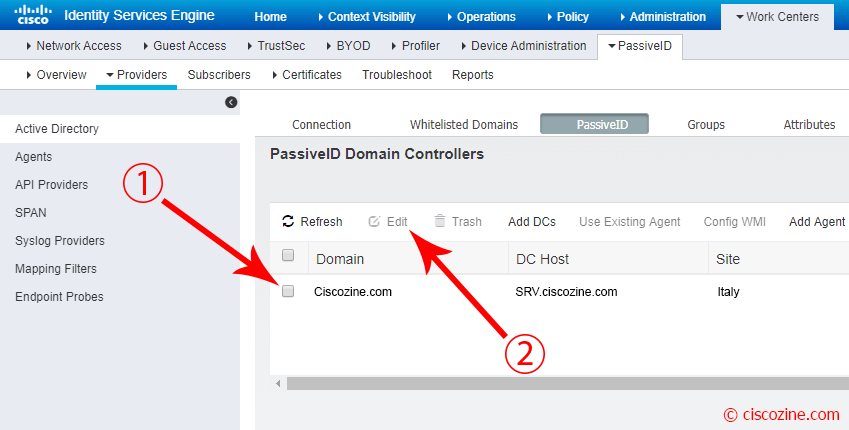
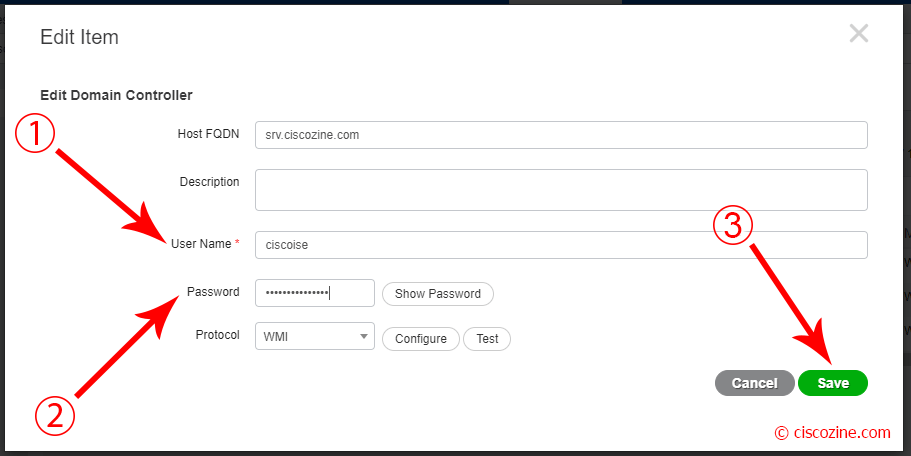
Select the domain just inserted and click “Edit”.
A popup appears; compile the fields Username/Password and press “Save”.
Select the domain and click on the “Config WMI” button to inititate the WMI connection.
After few seconds, a popup gives back the result:

Once registration goes fine, ISE will begin monitoring AD for Windows logon events.
Remember: PassiveID does not currently look for log off events from the DC. The only mechanism to clear a PassiveID session is to use the endpoint probe or allow the global timeout to occur.
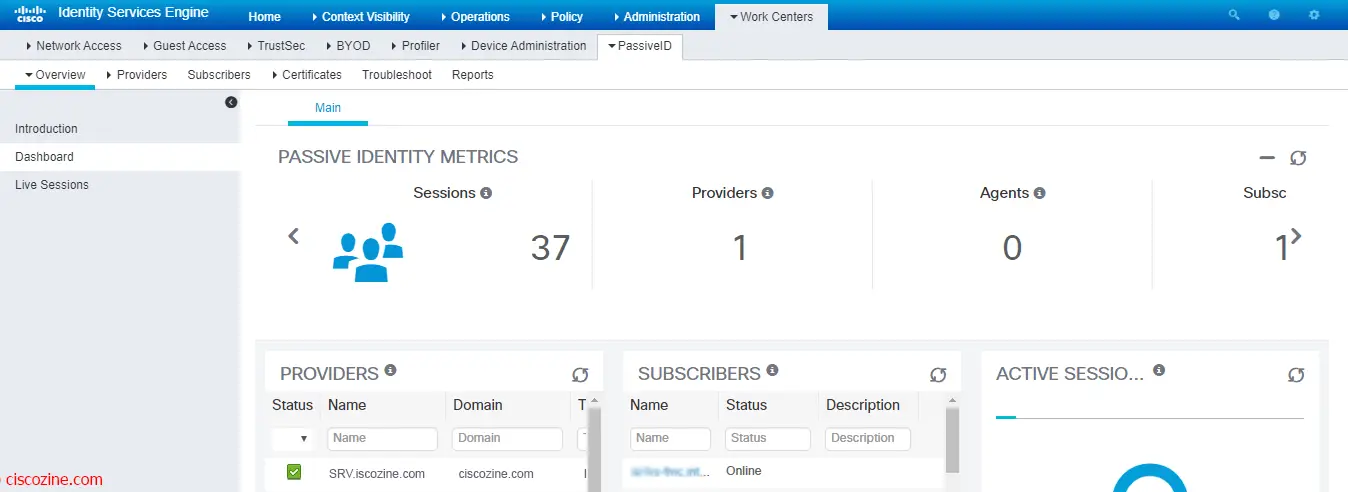
To view a brief summary of the PassiveID info, click on the “Dashboard” link.
To view any session learned via PassiveID, click on the “Live Sessions” link.
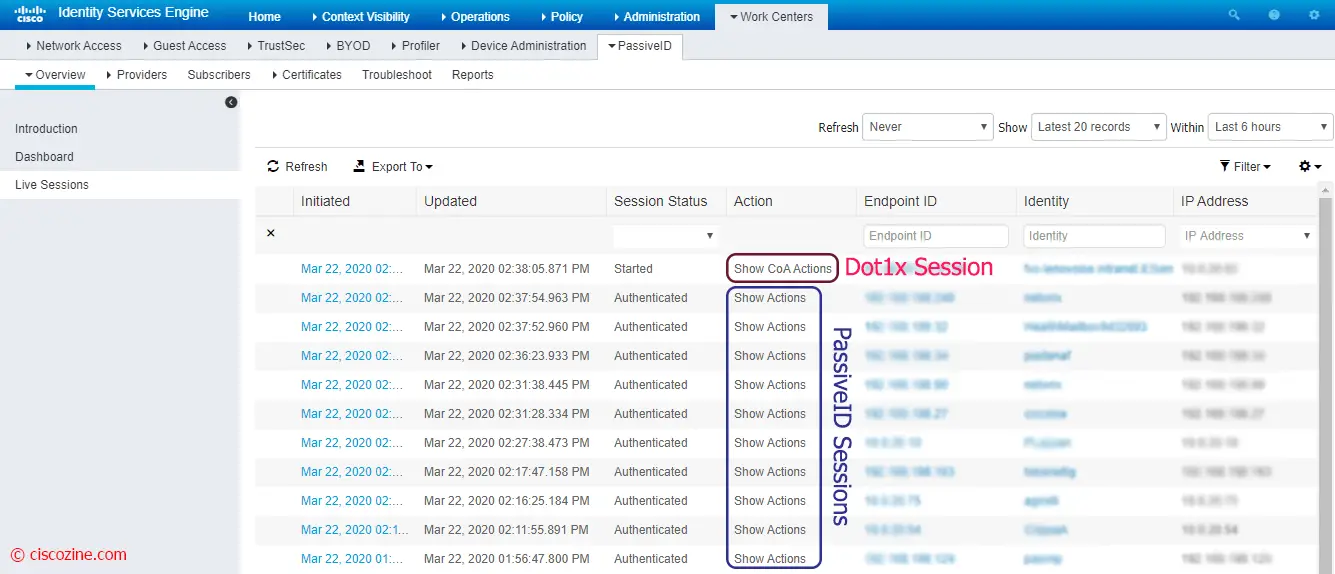
Note: If you have RADIUS configured, you will see those sessions as well as the ones learned via PassiveID. The sessions created via PassiveID will have a “Show Actions” (blue) option instead of “Show CoA Actions” (red).
And now, what can we do? PassiveID is the milestone for other two Cisco ISE features:
- Easyconnect: it provides port-based authentication similar to 802.1X, but easier to implement. it learns about the authentication from Active Directory and provides session-tracking for active network sessions.
- PxGrid: it permits to share the context-sensitive information from Cisco ISE session directory with other network systems; it can also be used to exchange policy and configuration data between nodes like sharing tags and policy objects between Cisco ISE and third party vendors, and for other information exchanges
but I’ll explain these two topics in the next articles :)
References: