The Cisco Firepower can be managed with two different solutions:
- Firepower Device Manager (FDM)
- Firepower Management Center (FMC)
FDM lets you configure the basic features of the software that are most commonly used for small networks. It is especially designed for networks that include a single device or just a few, where you do not want to use a high-powered multiple-device manager to control a large network containing many FDM devices.
If you are managing large numbers of devices, or if you want to use the more complex features and configurations that FTD allows, use the Firepower Management Center (FMC) instead.
FDM is locally preinstalled on the Cisco Firepower software, while FMC is an appliance or a virtual machine.
If your firewall is configured using the Cisco FMC, the snmp settings can be found under “Device” -> “Device Managent” -> “SNMP”, but how can you configure SNMP via FDM? The only solution to enable and configure SNMP feature via FDM is to use FlexConfig Policy.
FlexConfig
A FlexConfig object contains the ASA commands required to configure a particular feature that you cannot otherwise configure using Firepower Device Manager. If there is a Smart CLI template for a feature, you cannot configure it using FlexConfig. You must use the Smart CLI object.
Note: Do not include the enable and configure terminal commands. The system enters the right mode for configuration commands automatically.
SNMP Configuration
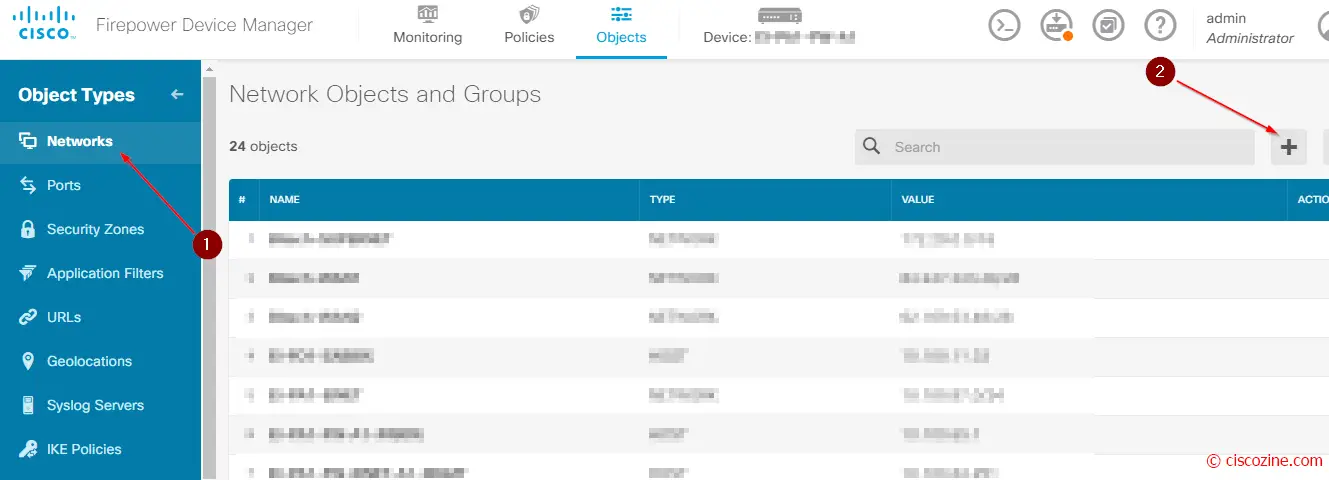
Network/secret objects
First of all, you need to configure two variables that will be used for the SNMP configuration:
- The SNMP server IP address
- The community string (in case of SNMP v2)
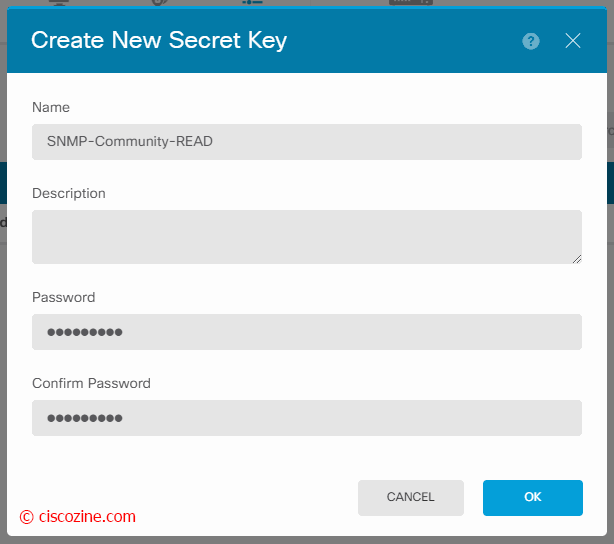
Click “Object”, “Secret Keys” and the “+” button:

Create the object “SNMP-Community-READ” and insert your SNMP community string:
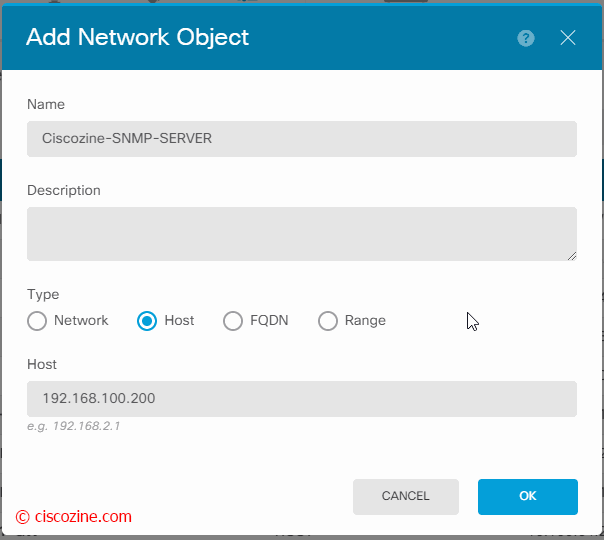
Create the network object “Ciscozine-SNMP-SERVER”:
FlexConfig object
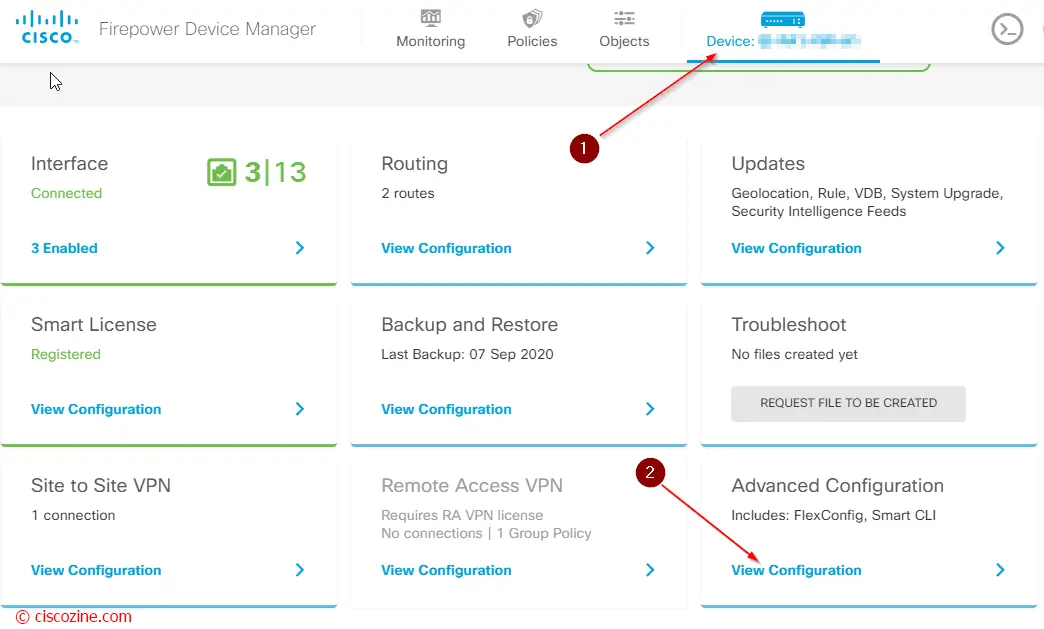
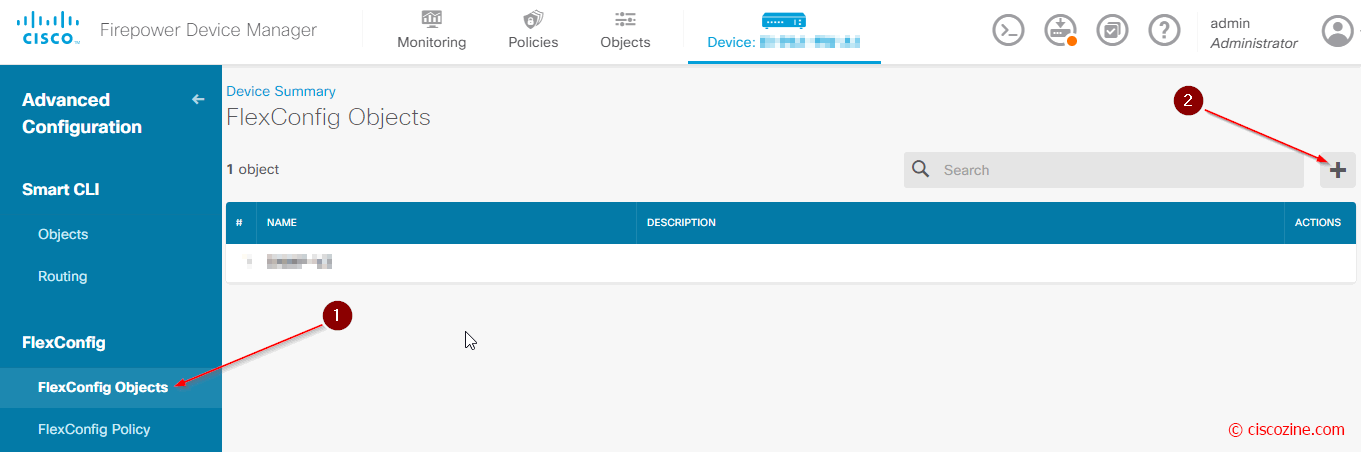
Click on the device and “View configuration” under the “Advanced Configuration” section:
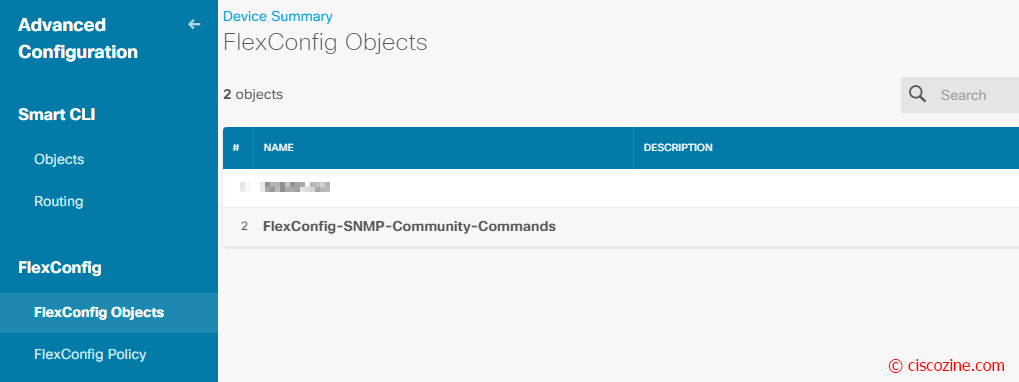
The “Advanced Configuration” appears; click “FlexConfig Objects”, then the “+” button:
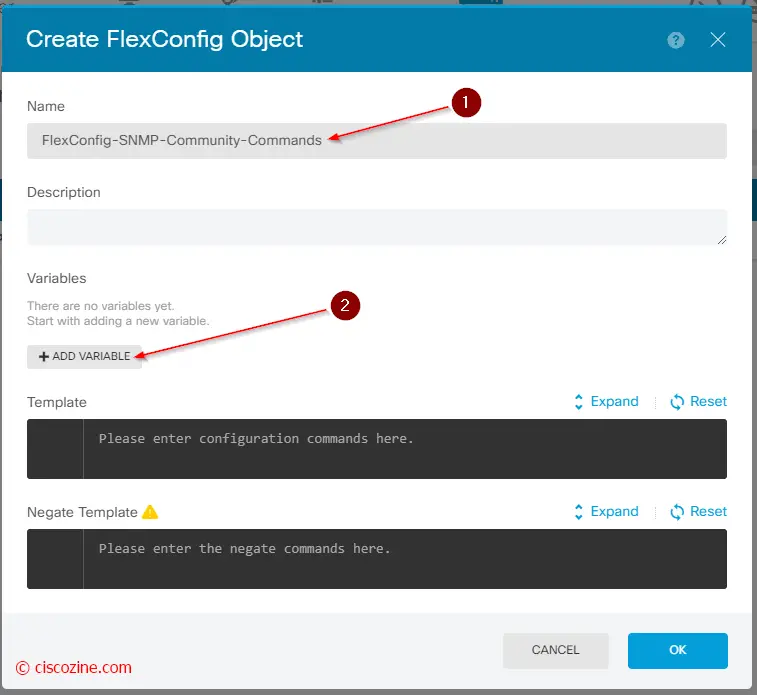
Create a new object with the name “FlexConfig-SNMP-Community-Commands” and click on the “add variable” button:
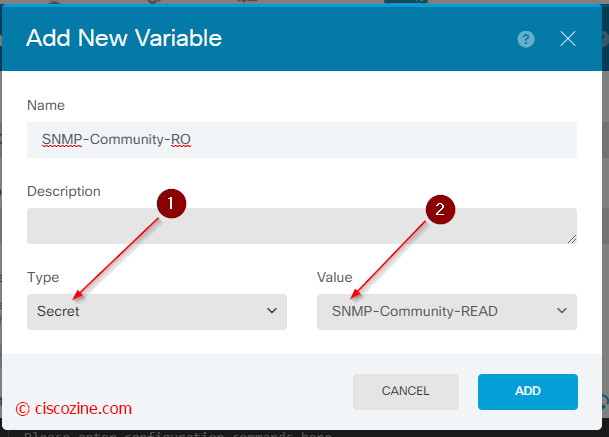
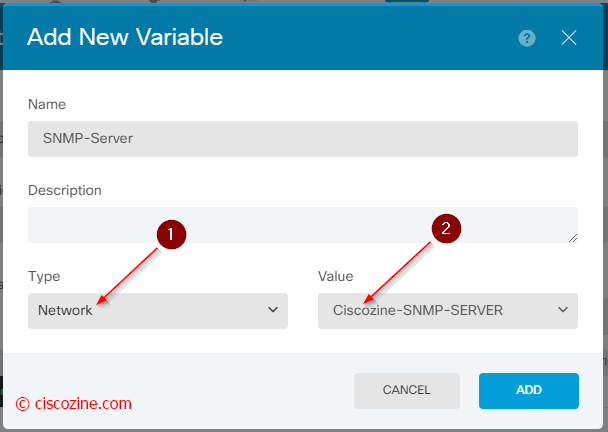
You have to create two new flexconfig variables:
SNMP-Community-RO (a secret variable) that is referenced to the “SNMP-Comunity-READ”.
SNMP-Server (a network variable) that is referenced to the “Ciscozine-SNMP-SERVER”.
To use a variable, type the variable name between double-braces: {{variable_name}} . For variables that refer to objects, you must include the attribute whose value you are retrieving: {{variable_name.attribute}} .
In that example, you use two different objects: secret and network. To find how these objects/attributes are defined, open the browser to https://[IP-FDM]/#/api-explorer.
The “secret” object is defined like that:
{
  "version": "ca76qdufy6an",
  "name": "SNMP-Community-READ",
  "description": "",
  "password": "*********",
  "id": "e2a2b175-f1d7-11ea-a472-4785cfdb89b0",
  "type": "secret",
  "links": {
    "self": "https://192.168.255.1/api/fdm/v3/object/secrets/e2a2b175-f1d7-11ea-a472-4785cfdb89b0"
}
so to get the community-key, you need to use the attribute “password“.
While the network object is defined like that:
{
  "version": "awr4gqi6sscje",
  "name": "Ciscozine-SNMP-SERVER",
  "description": null,
  "subType": "HOST",
  "value": "192.168.100.200",
  "isSystemDefined": false,
  "dnsResolution": "IPV4_AND_IPV6",
  "id": "aa6d5b0f-f1d7-11ea-a472-15f55a4198a4",
  "type": "networkobject",
  "links": {
    "self": "https://80.68.187.172/api/fdm/v3/object/networks/aa6d5b0f-f1d7-11ea-a472-15f55a4198a4"
}
so to get the ip address, you need to use the “value” attribute.
Curiosity: The variable follows the mustache notation; it is named “Mustache” because of heavy use of braces, { }, that resemble a sideways moustache.
Now it is possible write the FlexConfig. In the Template section, type the “ASA commands” required to configure the SNMP feature:
snmp-server host inside {{SNMP-Server.value}} community {{SNMP-Community-RO.password}} version 2c
snmp-server location Ciscozine Blog
snmp-server contact abuse@ciscozine.com
snmp-server community {{SNMP-Community-RO.password}}
In the Negate Template, enter the commands needed to remove or reverse the commands configured in the object body:
no snmp-server host inside {{SNMP-Server.value}} community {{SNMP-Community-RO.password}} version 2c
no snmp-server location Ciscozine Blog
no snmp-server contact abuse@ciscozine.com
no snmp-server community {{SNMP-Community-RO.password}}
Remember: The Negate section is very important and serves two purposes:
- It simplifies deployment. Before re-deploying the commands in the body, the system uses these commands to first erase or undo the configuration. This ensures a clean deployment.
- If you decide to remove the feature by removing the object from the FlexConfig Policy, the system uses these commands to remove the commands from the device.
Note: If you do not supply the commands needed to negate or reverse the CLI in the object body, the deployment might need to clear the entire device configuration and redeploy all policies, not just the commands within the object. This will make deployment take longer and also disrupt traffic.

Click OK to save the config.
Note: Obviously, you can have the same result defining the template without the variables; the use of variables are useful when the object are referenced not only to the flexconfig object but also in ACP.
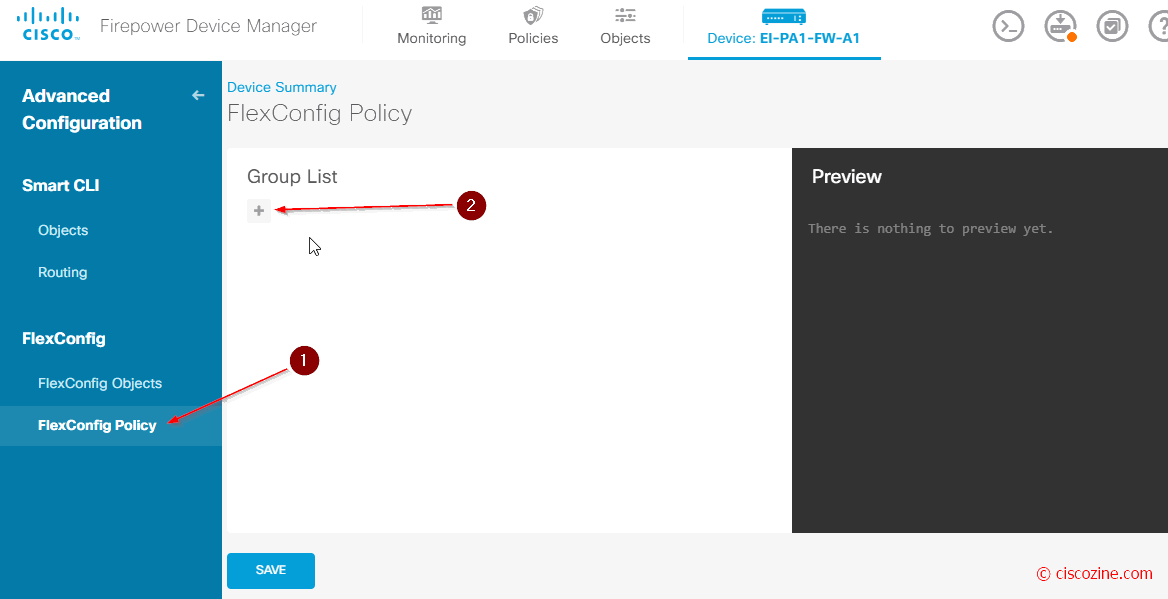
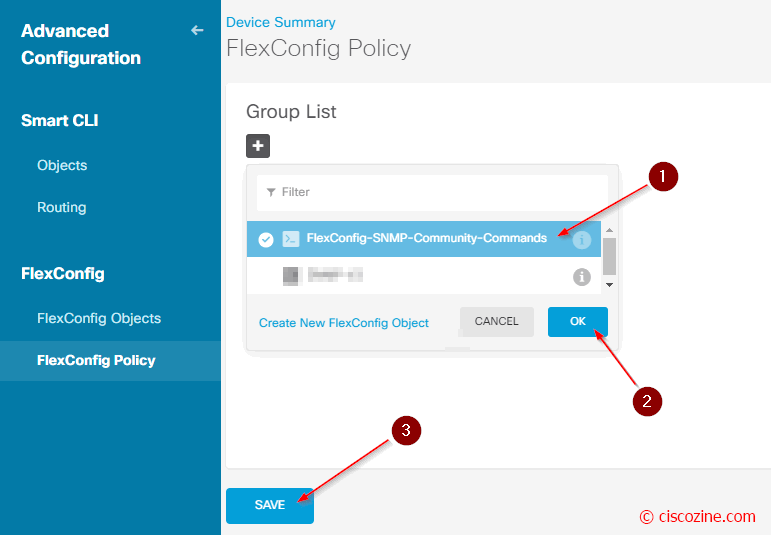
FlexConfig policy
At the end, you need to enable this FlexConfig object and deploy the new configuration:
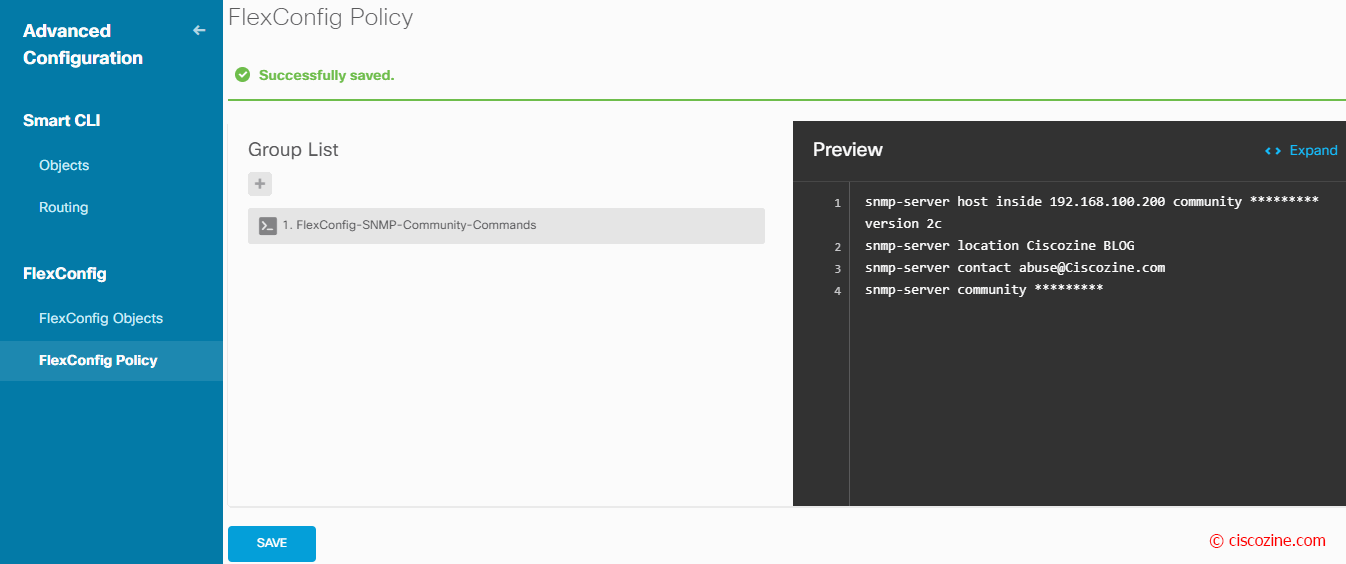
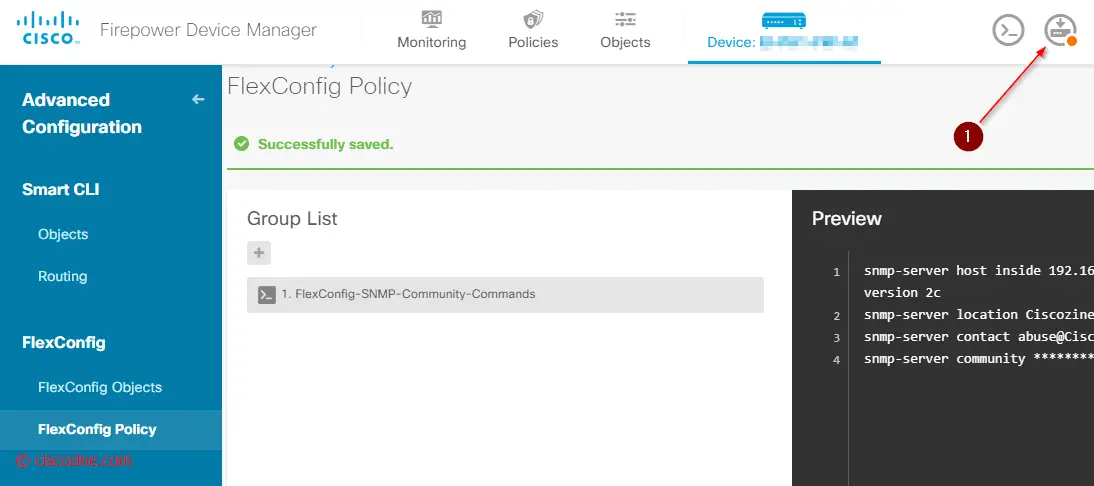
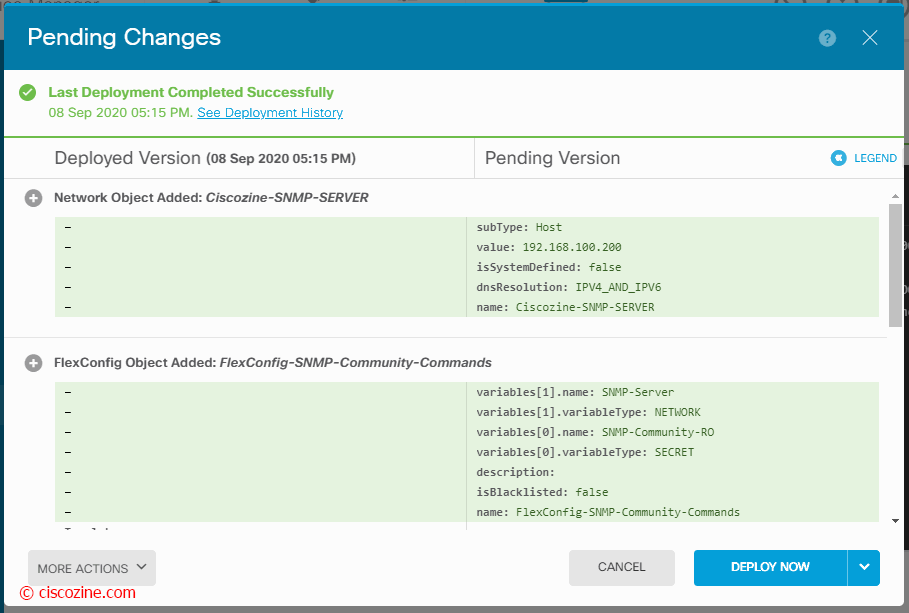
After the deployment, if you type the command “show running-config” via CLI, you will see the snmp commands; the firewall will respond to the SNMP Queries.
References:
Firepower Device Manager is easy to grasp system monitoring reports.
Nicely written. Very precise. Thanks much.