In the last years, one of my passions are raspberry and arduino projects. Recently, surfing the linkedin articles, I noticed one: build a console server with a raspberry.
Nowadays, there are several remote console solutions, but, in my opinion, they are quite expensive; this is the reason I have decided to write this article: make a console server with cheaper components!
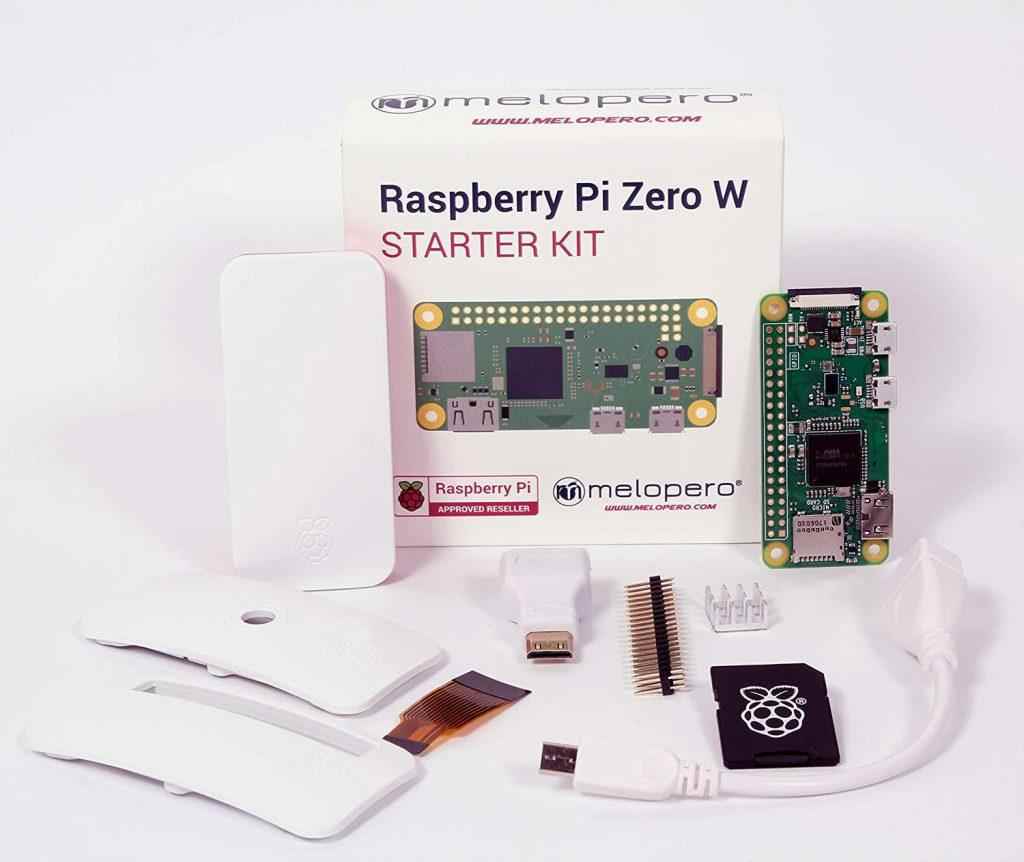
In my case, I bought a raspberry pi zero w and a USB-to-Console adapter (at the end of the article you will see the components required); for less than 50 euros you have your console server!
What is Raspberry
Raspberry Pi is a series of small single-board computers developed in the United Kingdom by the Raspberry Pi Foundation in association with Broadcom.
All models feature a Broadcom system on a chip (SoC) with an integrated ARM-compatible central processing unit (CPU) and on-chip graphics processing unit (GPU).
Installation
Download and flash the operating system. In this article, I use Raspberry Pi OS and I flash it using BalenaEtcher.
Raspberry configuration
If you haven’t a keyboard and a monitor, don’t worry; there’s a way to setup and work without it. It’s known as running the Pi “headless”. Follow these tips:
- Insert your SD card with Raspbian into it into your computer and open the SD card from your file explorer; the drive will be labeled boot.
- Create wpa_supplicant.conf; make sure that you change the file extension from .txt to .conf.
- Edit the wpa_supplicant.conf file with a text editor; modify and paste this template:
ctrl_interface=DIR=/var/run/wpa_supplicant GROUP=netdev
update_config=1
country=<Insert 2 letter ISO 3166-1 country code here>

network={
  ssid="<Your ssid>"
  psk="<Your ssid password>"
  scan_ssid=1 #if your ssid in not hidden remove this line
}
Note: See this link for a list of 2 letter ISO 3166-1 country codes.
- By default, the current version of Raspbian has SSH disabled. To enable it, create an empty file in the boot directory called ssh (make sure that the file has no file extension).
- Eject the SD card from your computer and insert it into your Pi, then power up your raspberry.
By default, you can log in using the credential pi/raspberry. Remember to change your ‘pi’ password using the command “passwd”.
Note: if you have monitor and keyboard and you want to configure wpa client and sshd, use the command “sudo raspi-config“.
Update operating system
To update and upgrade your Pi, use the commands below:
sudo apt update
sudo apt upgrade
Enable serial software
Install the “Serial port to network proxy” aka ser2net:
sudo apt install ser2net
Insert the USB2Serial and find the adapter path:
dmesg | grep tty
You will see something like this:
pi@raspberrypi:~$ dmesg | grep tty
[ 0.000000] Kernel command line: coherent_pool=1M 8250.nr_uarts=0 bcm2708_fb.fbwidth=720 bcm2708_fb.fbheight=480 bcm2708_fb.fbswap=1 smsc95xx.macaddr=B8:27:EB:B5:D0:EC vc_mem.mem_base=0x1ec00000 vc_mem.mem_size=0x20000000 console=ttyS0,115200 console=tty1 root=PARTUUID=5e3da3da-02 rootfstype=ext4 elevator=deadline fsck.repair=yes rootwait quiet splash plymouth.ignore-serial-consoles
[ 0.000637] console [tty1] enabled
[ 0.876650] 20201000.serial: ttyAMA0 at MMIO 0x20201000 (irq = 81, base_baud = 0) is a PL011 rev2
[22836.190080] usb 1-1: pl2303 converter now attached to ttyUSB0
pi@raspberrypi:~$
The device path is /dev/ttyUSB0.
Serial configuration
Configuration is accomplished through the file /etc/ser2net.conf. A file with another name or path may be specified using the -c option, or individual config lines may be specified with the -C option. This file consists of one or more entries with the following format:
<TCP port>:<state>:<timeout>:<device>:<options>

BANNER:<banner name>:<banner text>

TRACEFILE:<tracefile name>:<tracefile>
Edit the ser2net file:
sudo nano /etc/ser2net.conf
Comment the default configuration using the “#” at the beginning of each line:
# BANNER:banner:\r\nser2net port \p device \d [\s] (Debian GNU/Linux)\r\n\r\n
# 2000:telnet:600:/dev/ttyS0:9600 8DATABITS NONE 1STOPBIT banner
# 2001:telnet:600:/dev/ttyS1:9600 8DATABITS NONE 1STOPBIT banner
# 3000:telnet:600:/dev/ttyS0:19200 8DATABITS NONE 1STOPBIT banner
# 3001:telnet:600:/dev/ttyS1:19200 8DATABITS NONE 1STOPBIT banner
… then insert the text:
BANNER:banner:\r\nCiscozine remote console port \p device \d [\s]\r\n\r\n
9600:telnet:600:/dev/ttyS0:9600 8DATABITS NONE 1STOPBIT banner
Note: In my case the adapter is “/dev/ttyusb0”, but it depend on the console adapter.
Remember: Filenames and banners may contain normal “C” escape sequences:
\a - bell
\b - backspace
\f - form feed
\n - newline
\r - carraige return
\t - tab
\v - vertical tab
\ - \
\? - ?
\' - '
\" - "
\nnn - octal value for nnn
\xXX - hex value for XX
They may also contain, \d for the device name and \p for the TCP port number. A banner may contain \s for the serial port parameters (eg 9600N81) of the given connection.
A filename may also contain the following sequences:
\Y -> year
\y -> day of the year (days since Jan 1)
\M -> month (Jan, Feb, Mar, etc.)
\m -> month (as a number)
\A -> day of the week (Mon, Tue, etc.)
\D -> day of the month
\e -> epoc (seconds since Jan 1, 1970)
\U -> microseconds in the current second
\p -> local port number
\d -> local device name
\I -> remote IP address (in dot format)
\H -> hour (24-hour time)
\h -> hour (12-hour time)
\i -> minute
\s -> second
\q -> am/pm
\P -> AM/PM
Restart the service
systemctl restart ser2net.service
Connect to your Cisco device using the command:
telnet <your_raspberry_ip> 9600
Remember: each time that you change the ser2net configuration you need to restart the service.
Note: it is possible to connect more than one serial-usb adapter!
Materials needed:
Below a shortlist of material required:
Raspberry Pi Zero W Basic Starter Kit:
- America: https://amzn.to/38SGEYS
- United kingdom: https://amzn.to/3mcuYTQ
- Canada: https://amzn.to/3pDXYXu
- Germany: https://amzn.to/3f7FtFM
- France: https://amzn.to/2IAtaGt
- Spain: https://amzn.to/2UCFfx0
- Italy: https://amzn.to/2MjwHdv
- Japan: https://amzn.to/35CJlLP
- International (Aliexpress): https://s.click.aliexpress.com/e/_9v2ktI
USB to RS232 DB9:
- America: https://amzn.to/3kLFPU4
- United kingdom: https://amzn.to/2W8UQoW
- Canada: https://amzn.to/3lEid4Z
- Germany: https://amzn.to/3kGSHKZ
- France: https://amzn.to/3pBAwtR
- Spain: https://amzn.to/35EmDTF
- Italy: https://amzn.to/3hzmpS8
- Japan: https://amzn.to/3lFKMyS
- International (Aliexpress): https://s.click.aliexpress.com/e/_9wmbjm
Obviously, you can make the same configuration will all raspberry family depending by your requirements. Enjoy!

